Solution: Using Official Steam method (reinstalling client)
Please make sure that you have your Steam credentials at hand before starting this method. In the case of any problem with your password, we also advise you to double check if Steam is linked to any of your email addresses. Furthermore, we also advise that you don’t install Steam to an external hard drive because of the potential problems you may face.
Step 1: Backing up game files
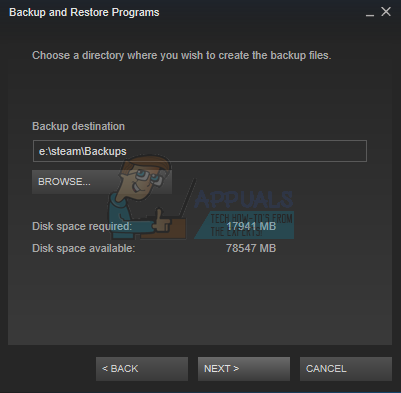
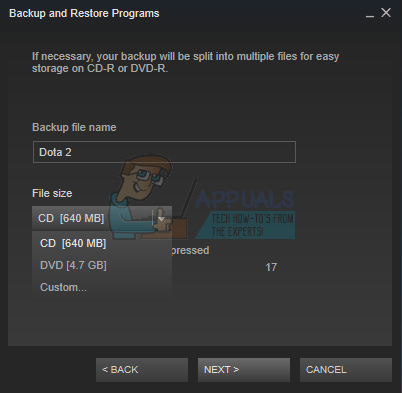
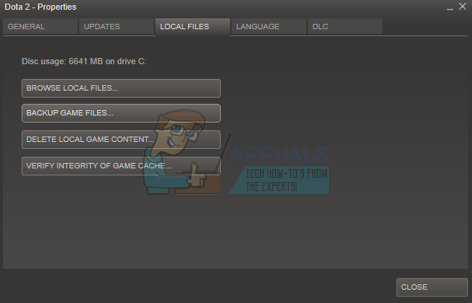
Before we start moving Steam to your new PC, we will make a backup of each of your Steam games. If anything goes wrong with the installation, we can always restore your downloaded games. Another thing to keep in mind is that many games use third party applications/downloaders. They will not work with Steam’s backup feature. These games include many third party free to play as well as MMO games. Only the games which are completely downloaded, installed and patched through Steam can use the backup feature correctly. The backup created by Steam will not include your custom maps, saved games, or configuration files. In order to back them up too, you will have to browse to your Steam directory (C:\Program Files\Steam\SteamApps\common<game name>) and copy the files located in these folders: /cfg/ (Configuration files) /downloads/ (This includes custom content used by multiplayer games) /maps/ (Custom maps are found here which are downloaded on multiplayer games) /materials/ (This includes custom skins and even textures) /SAVE/ (You find your single player saved games in this folder. After you copy these files, after restoring back up, you will need to paste them again in their corresponding folders.
Step 2: Relocating Steam files
Since we have backed up all the games in case anything goes wrong, we can proceed with moving your Steam to another PC.
SteamApps (Folder) Userdata (Folder) Steam.exe (Application)
Now Steam will briefly update before the client comes up. Now we need to verify the game cache before you are ready to use Steam.
What to do if you encounter an error?
You may experience an error from Steam if the moving process encountered a hurdle due to some technical issue. No need to worry, just follow the steps listed below and you will be back gaming in no time. First, we have to completely uninstall Steam before we can reinstall it again. There are two ways to uninstall Steam, you can either remove it from the control panel or you can remove it by altering the registry. It is advised to try removing it from the control panel. If there is some error involved, you can follow the method of altering the registry.
Uninstalling through Control Panel
Uninstalling manually
When we deal with the registry, we have to be extra careful not to tamper other registries. Doing so can result on major technical problems in your PC. Always follow the steps very carefully and only do what is mentioned.
Right click on Valve and select the option delete.
For 64 bit computers, navigate to: HKEY_LOCAL_MACHINE\SOFTWARE\Wow6432Node\Valve
Right click on Valve and select the option delete.
Right click on Steam and press delete.
Installing Steam
Since we have uninstalled Steam again, we can start the installation process. You can get the Steam installation files from here. Click on “Install Steam Now”. Your computer will download the required files and upon opening, ask for the install location you wish to choose. If you backed up your games in the method listed above, you can restore them to avoid downloading the games all over again.
How to Transfer Files Securely using Serv-U Managed File Transfer ServerHow to Move Origin Games to Another DriveHow to: Play Steam Games without Steam?Fix: This File came from Another Computer and might be Blocked


