Salient Features of the dock are:
Tool-free design allows mount drive without tools and screws.Dual Bay SATA Dock fits 2x 2.5”/3.5” SATA HDD/SSD.USB 3.0 Speed up to 5 Gbps enabled.One Step Duplicate Drive without using the Computer.Plug-n-Play. No driver needed.
Packaging and Unboxing
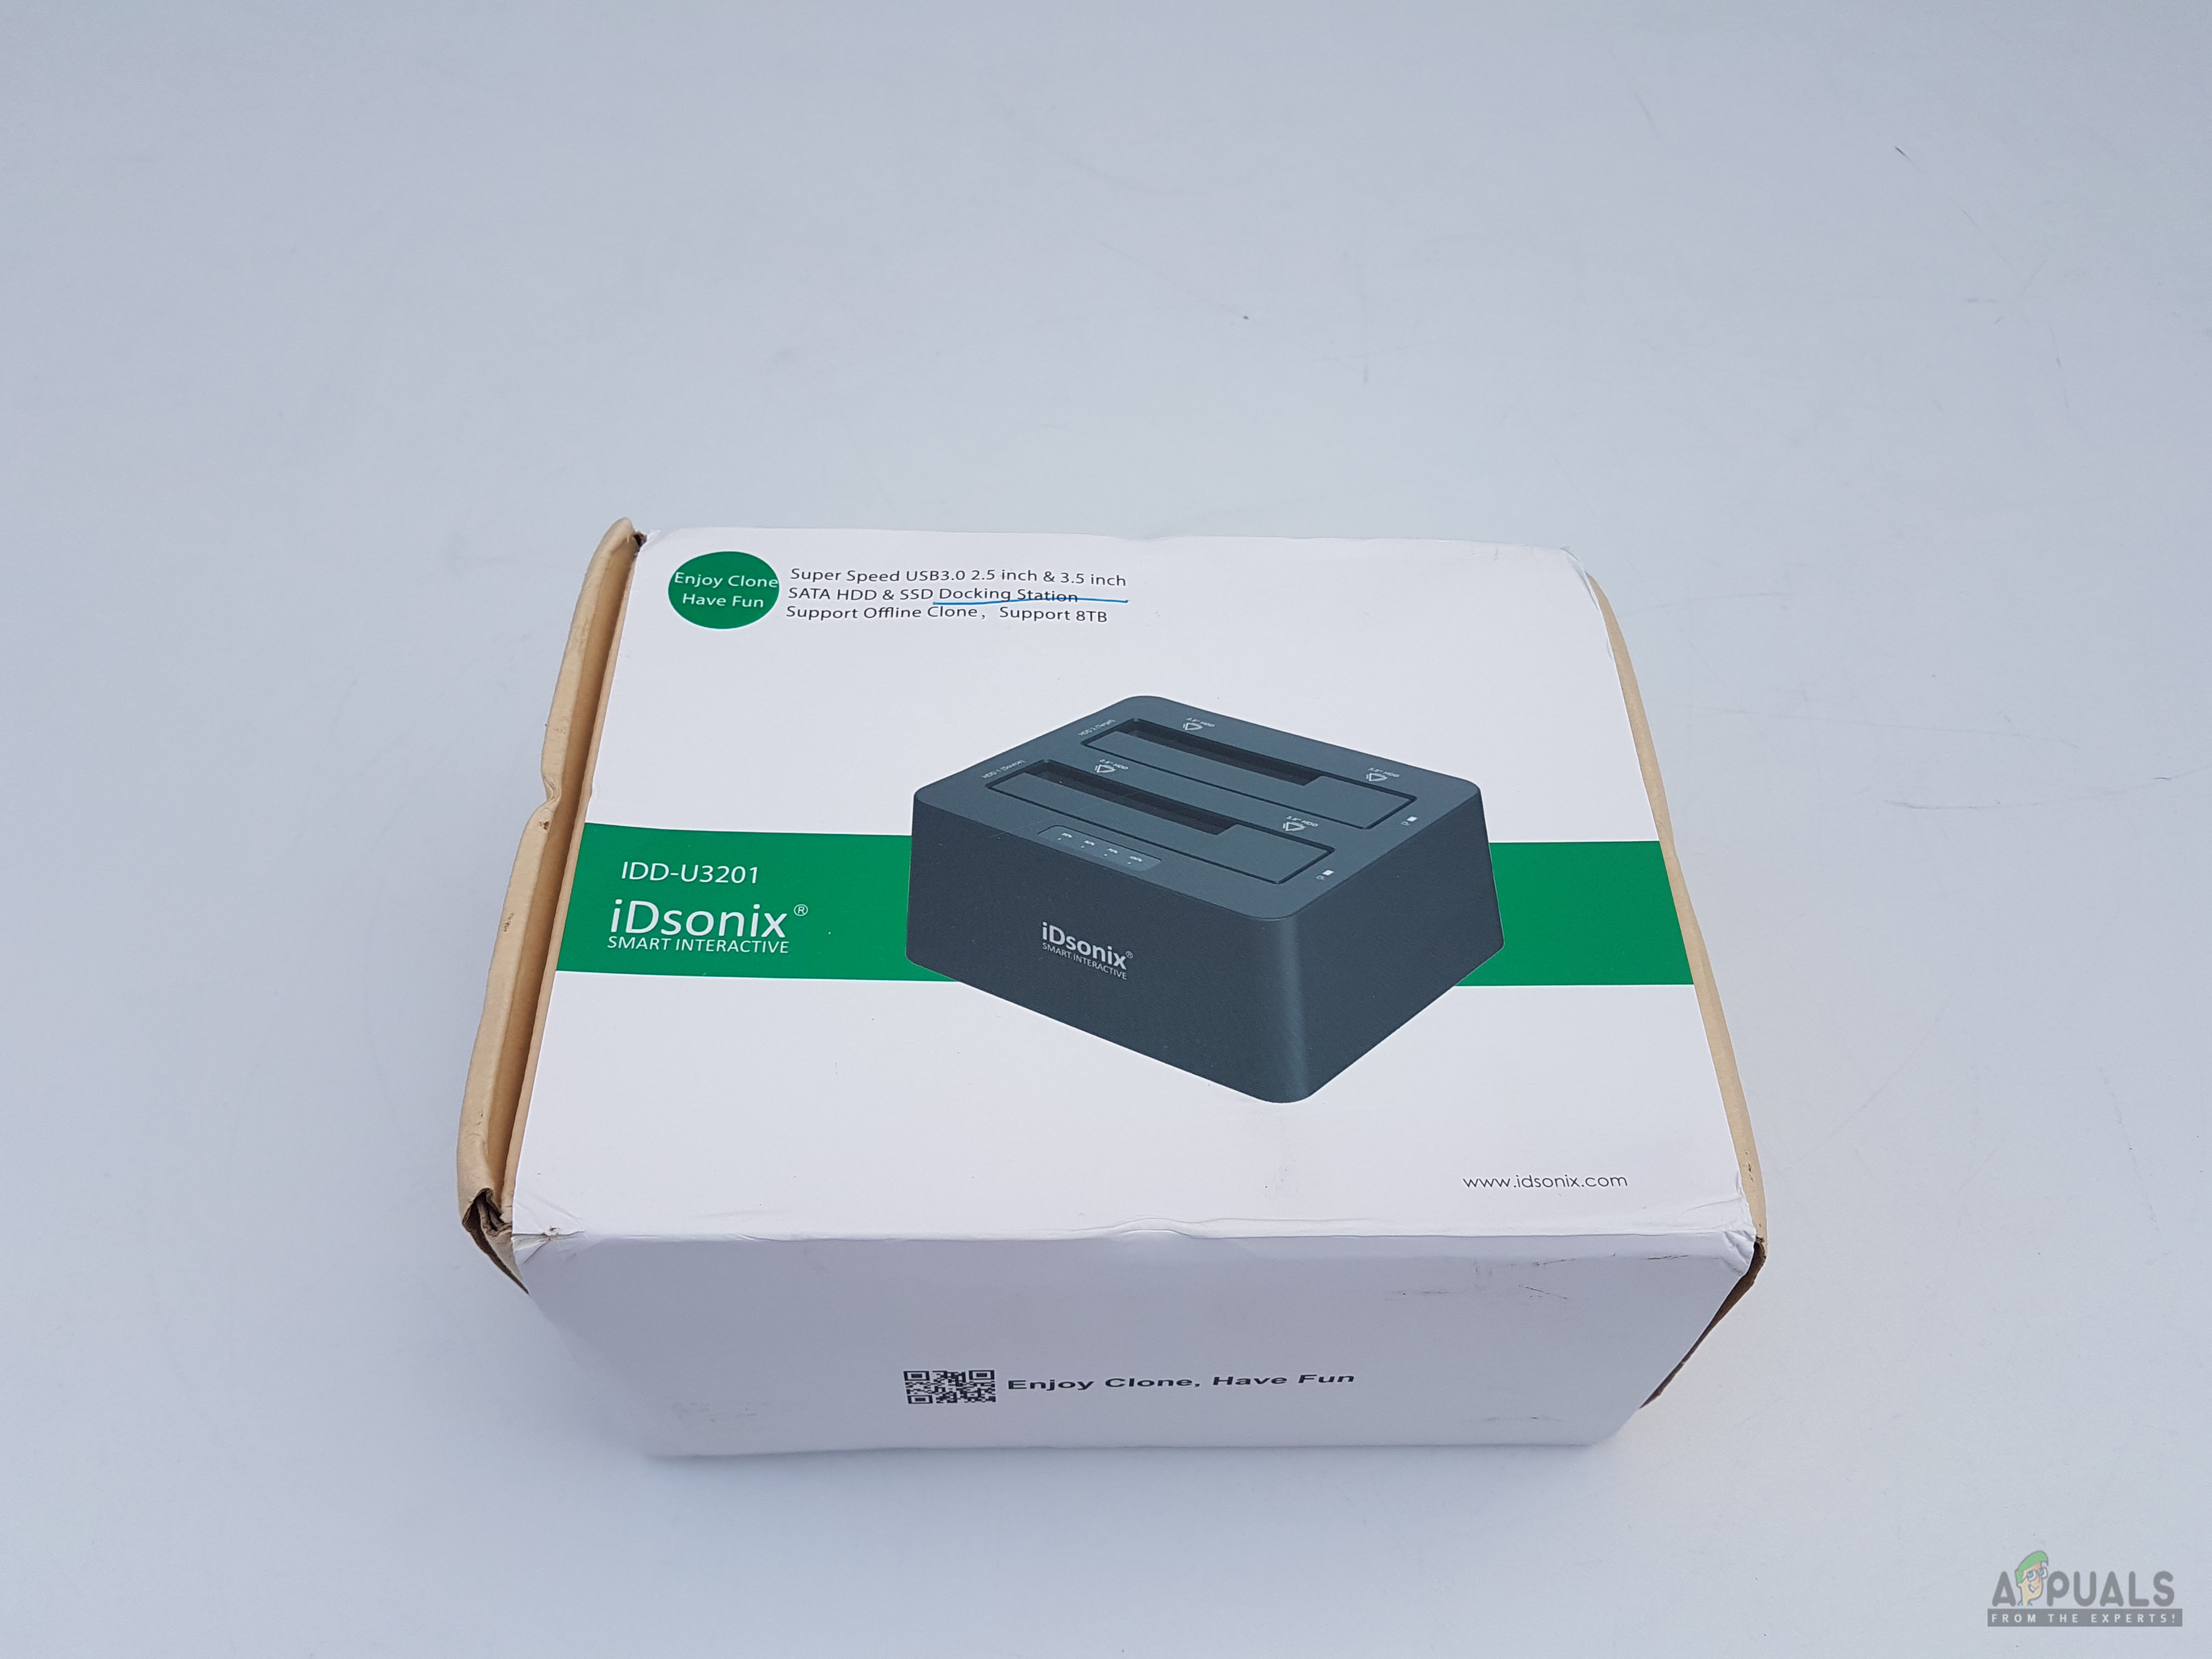
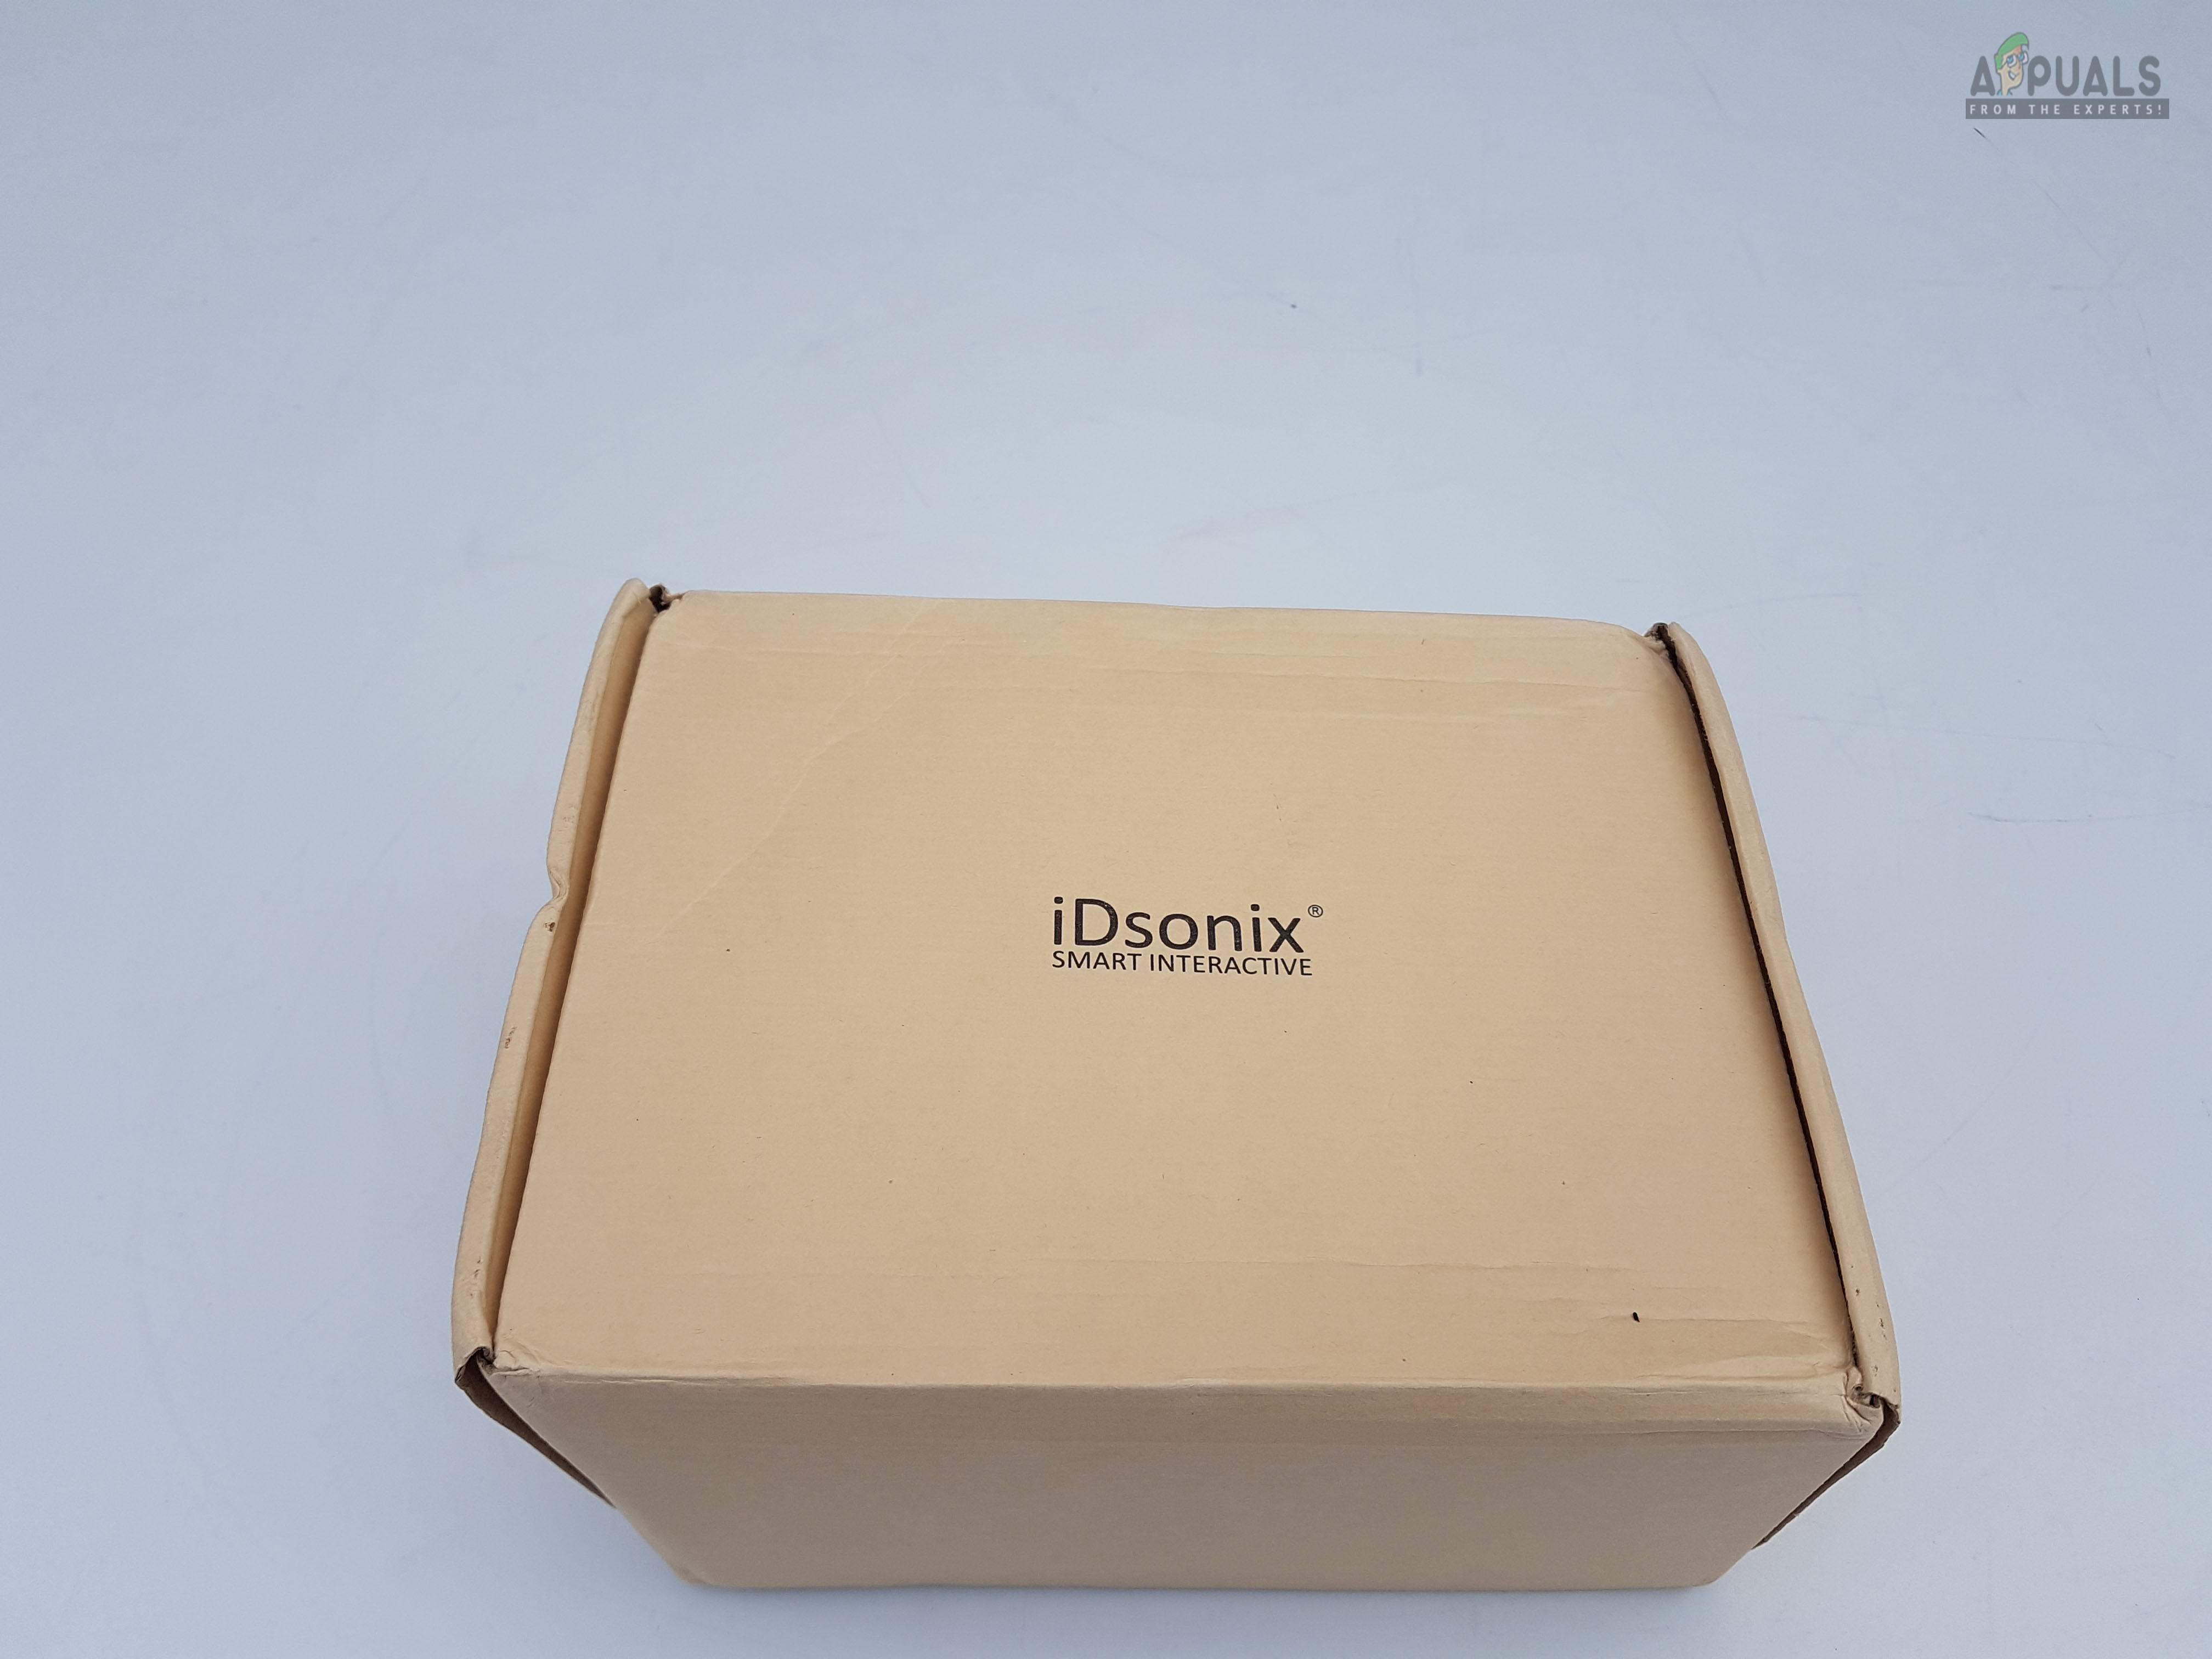
The dock is shipped inside a cardboard box. There is a wrapper on the cardboard box with the literature and other details about the dock.
This side has a white and green colors scheme. The part name of the product is printed on the top left side. There is a picture of the dock in the main section. The part no of the product is printed on the left side of the dock.
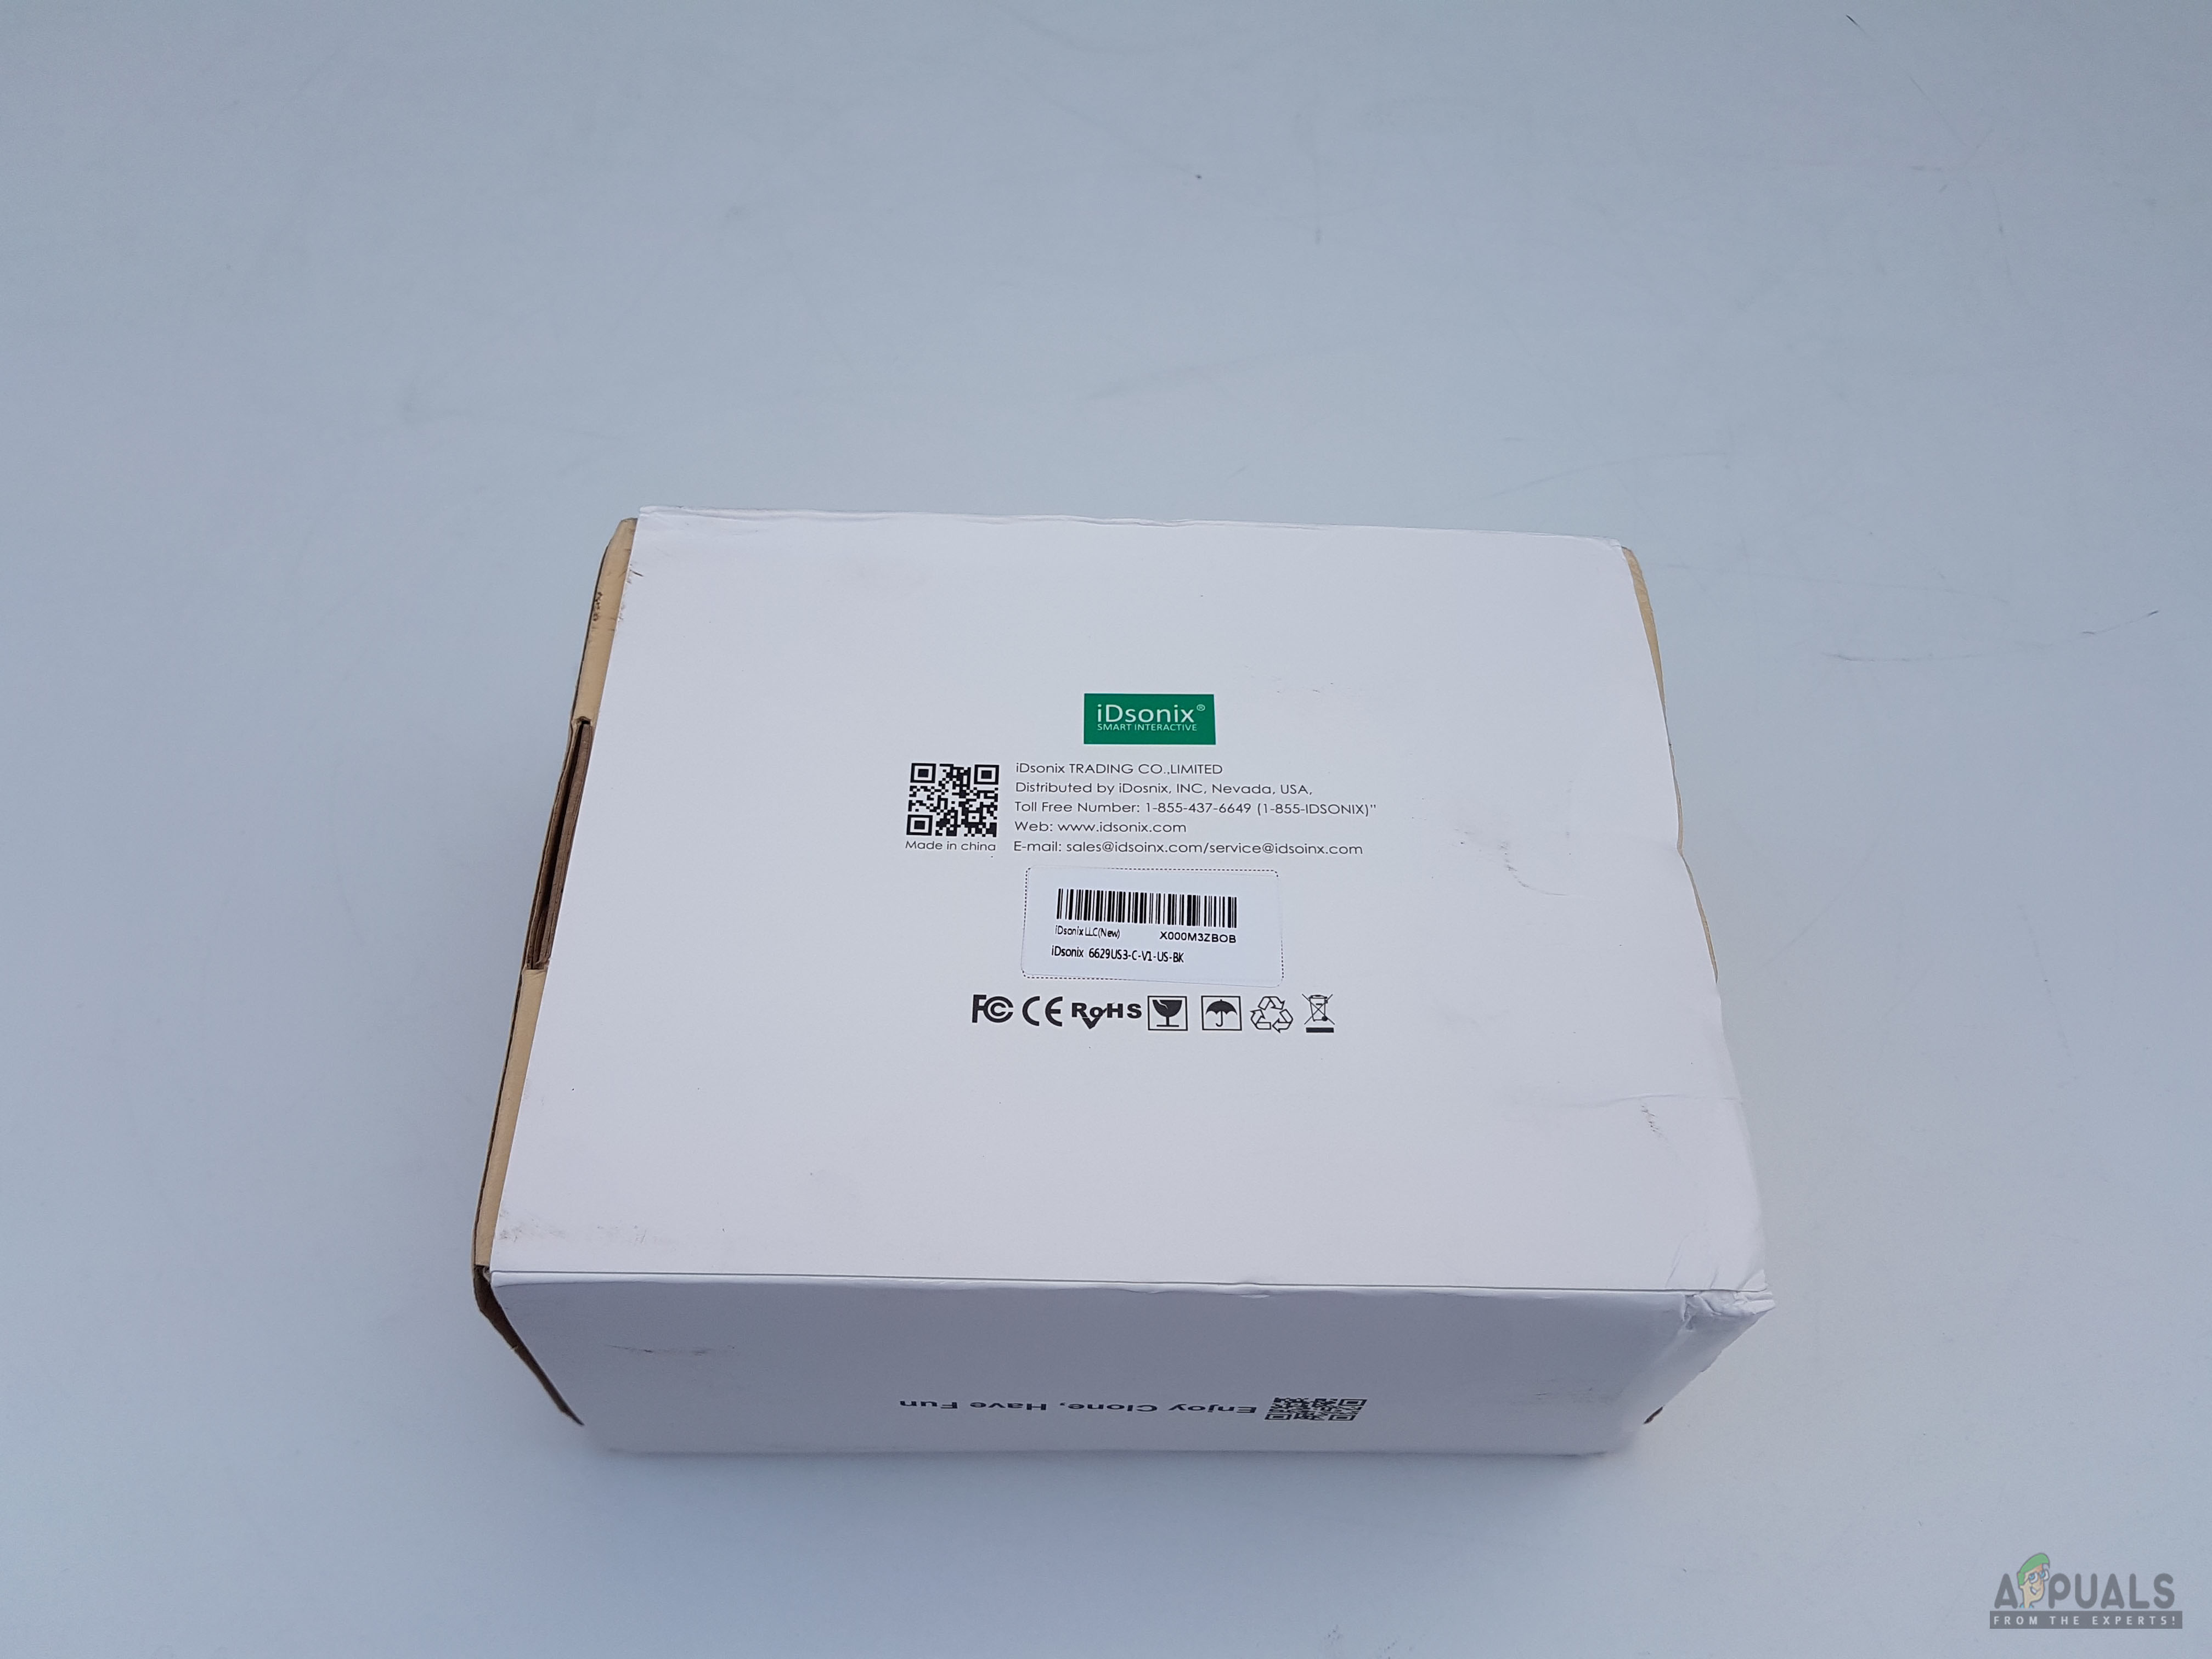
The bottom side of the packing box has a serial number sticker pasted on it. Company’s contact information is printed above that sticker.
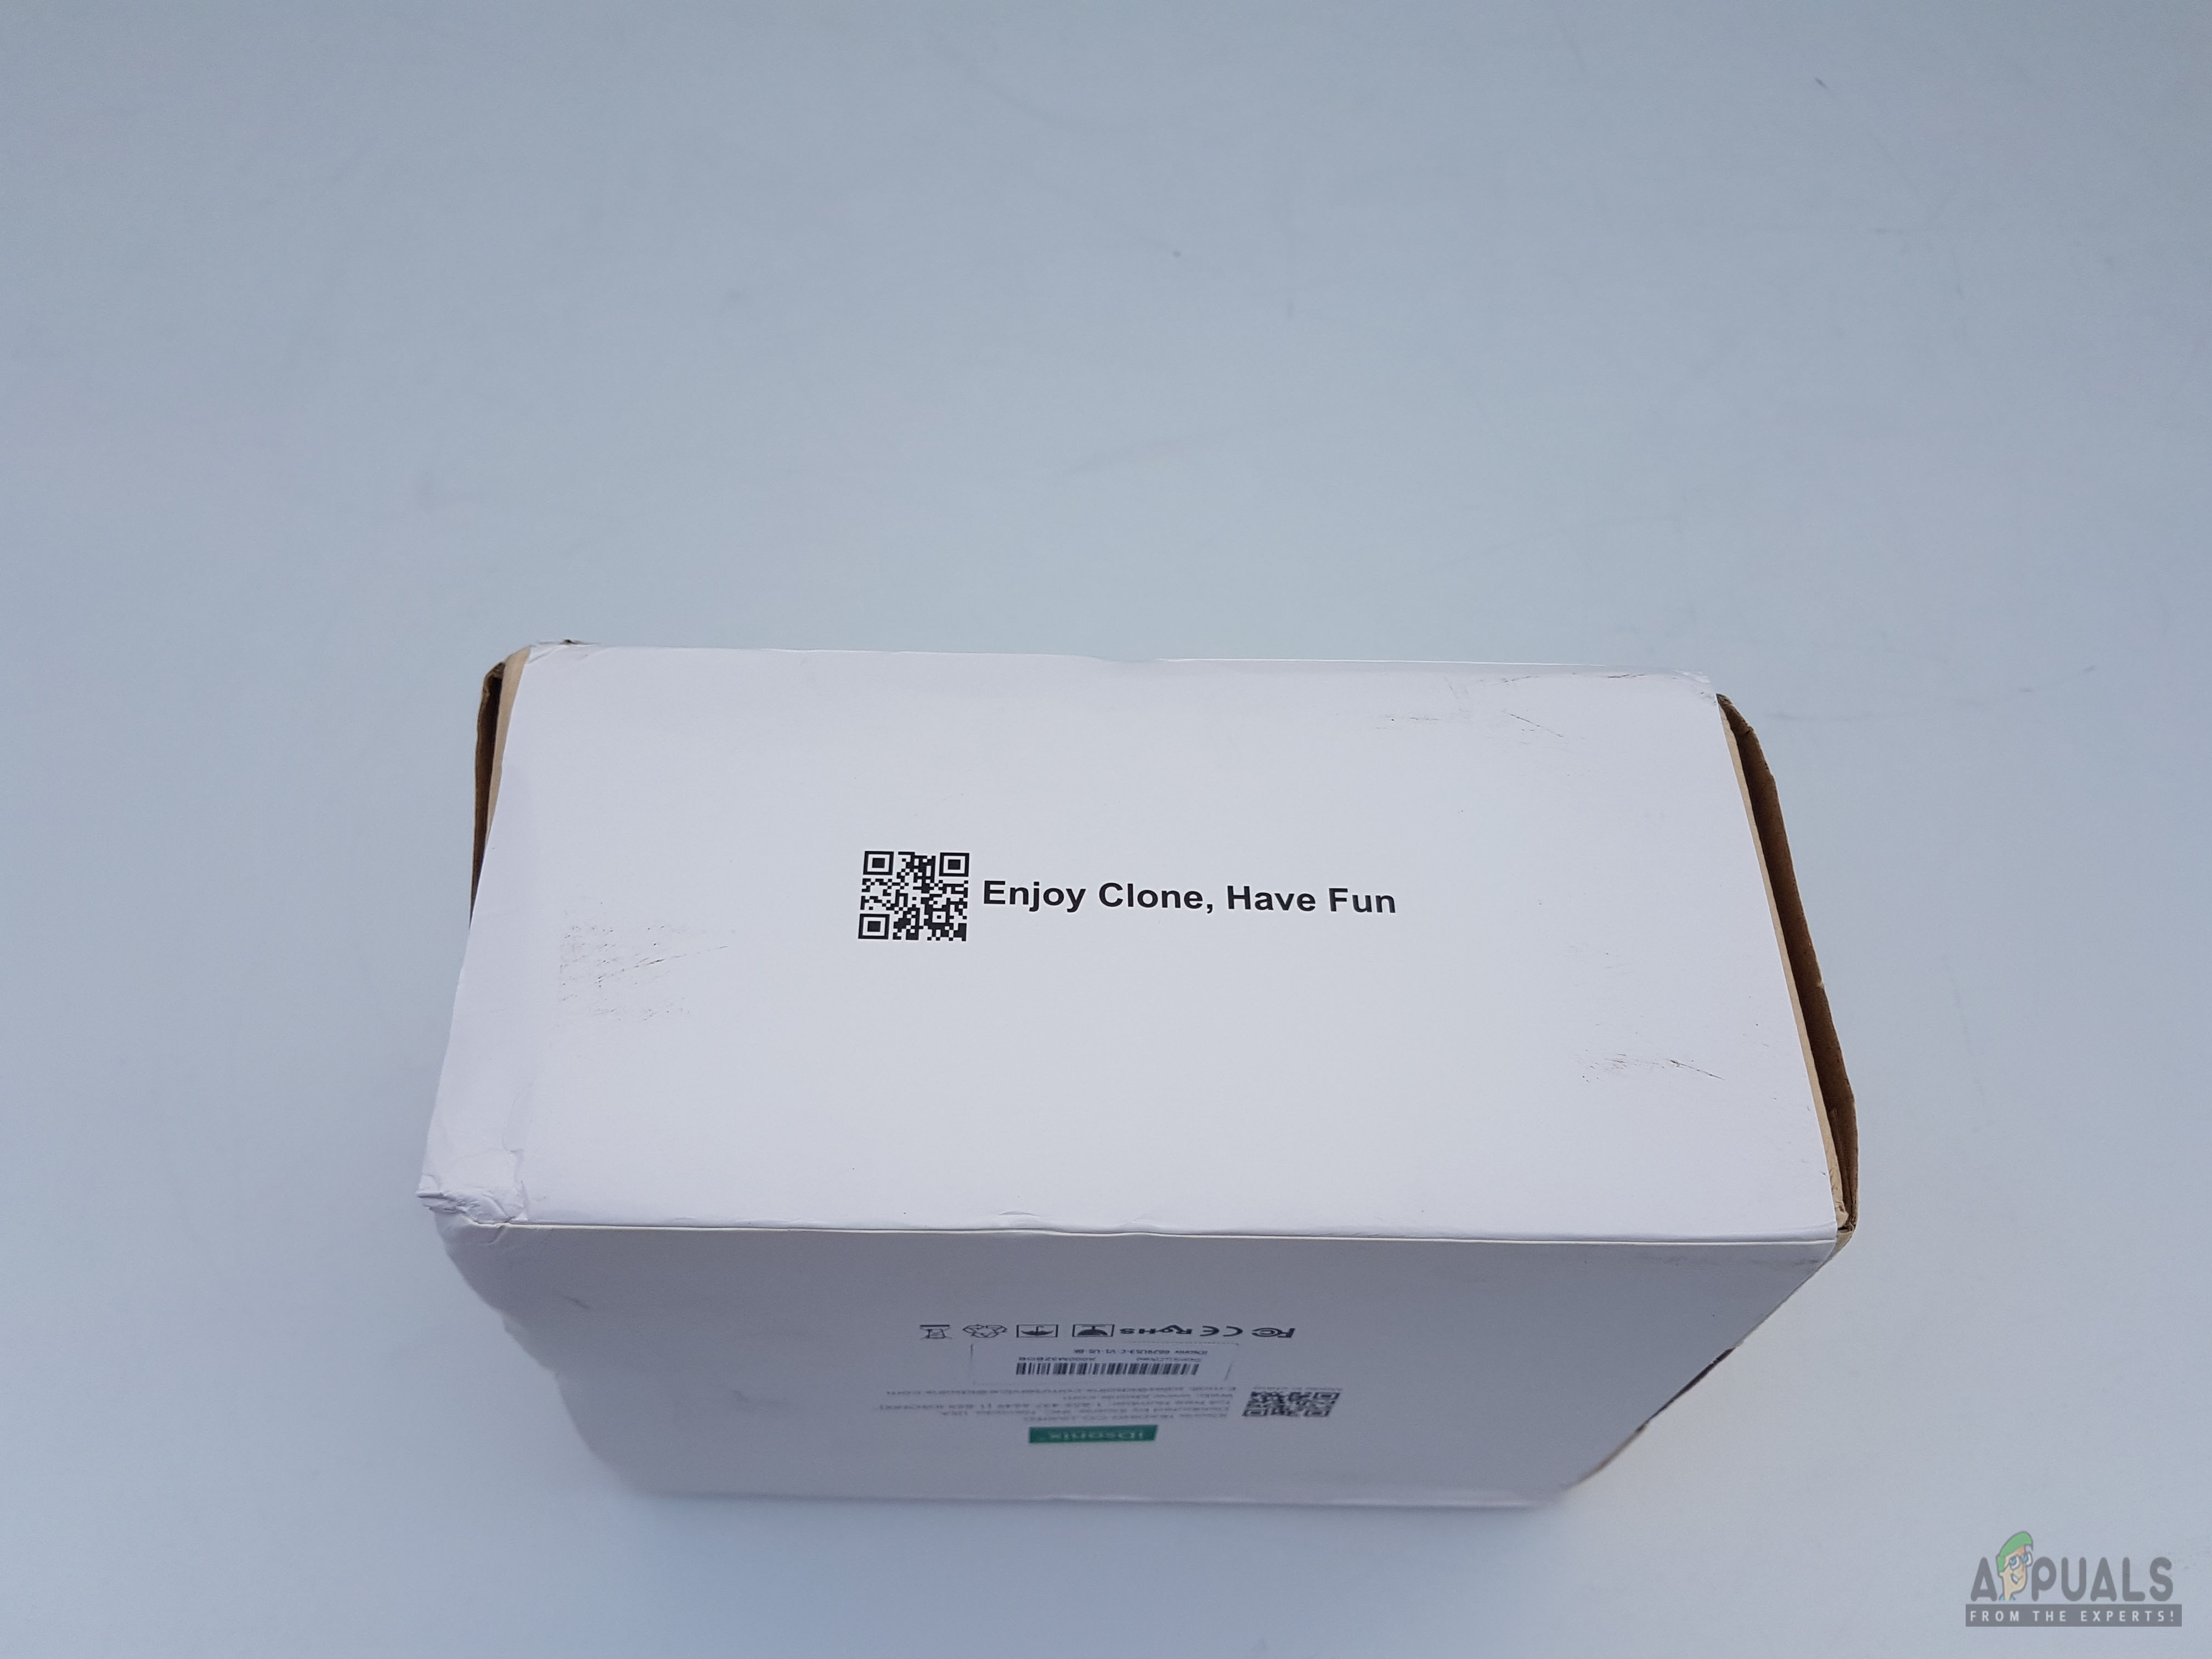
Enjoy clone, Have Fun is printed on this side.
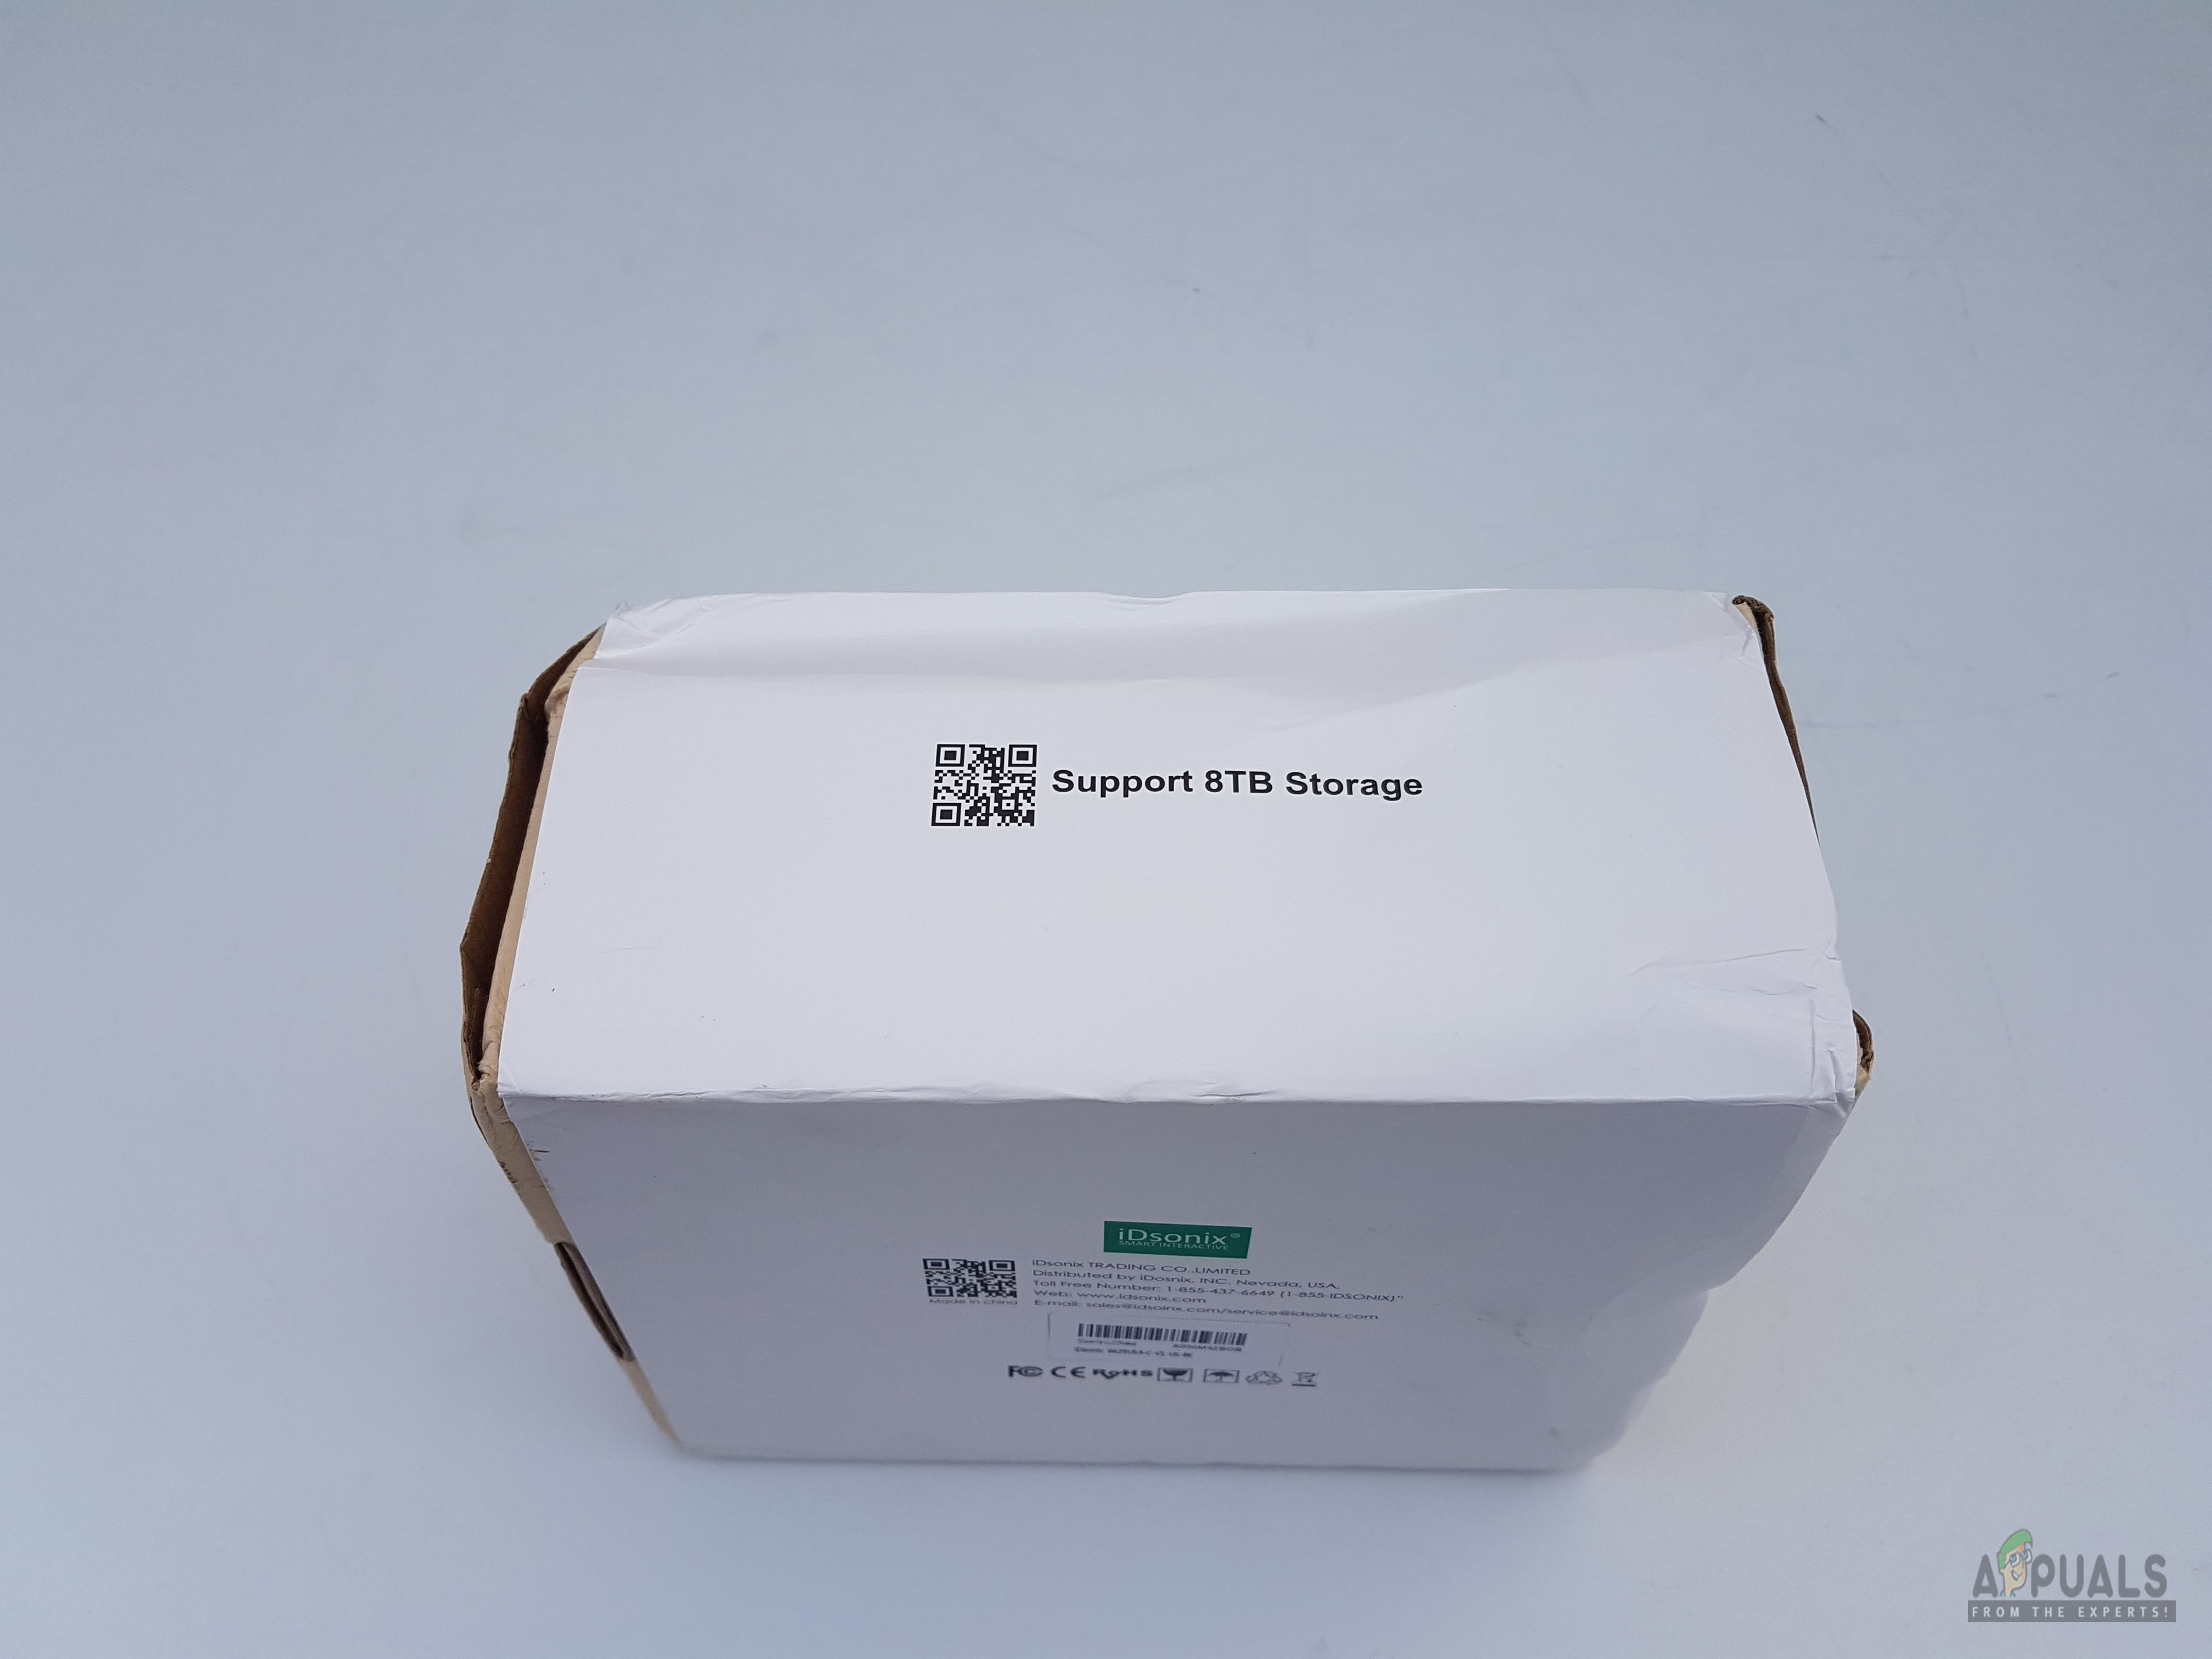
Support up to 8TB Storage is printed on this side.
Taking the wrapper off, we can see that iDsonix is printed on the top side of the inner box.
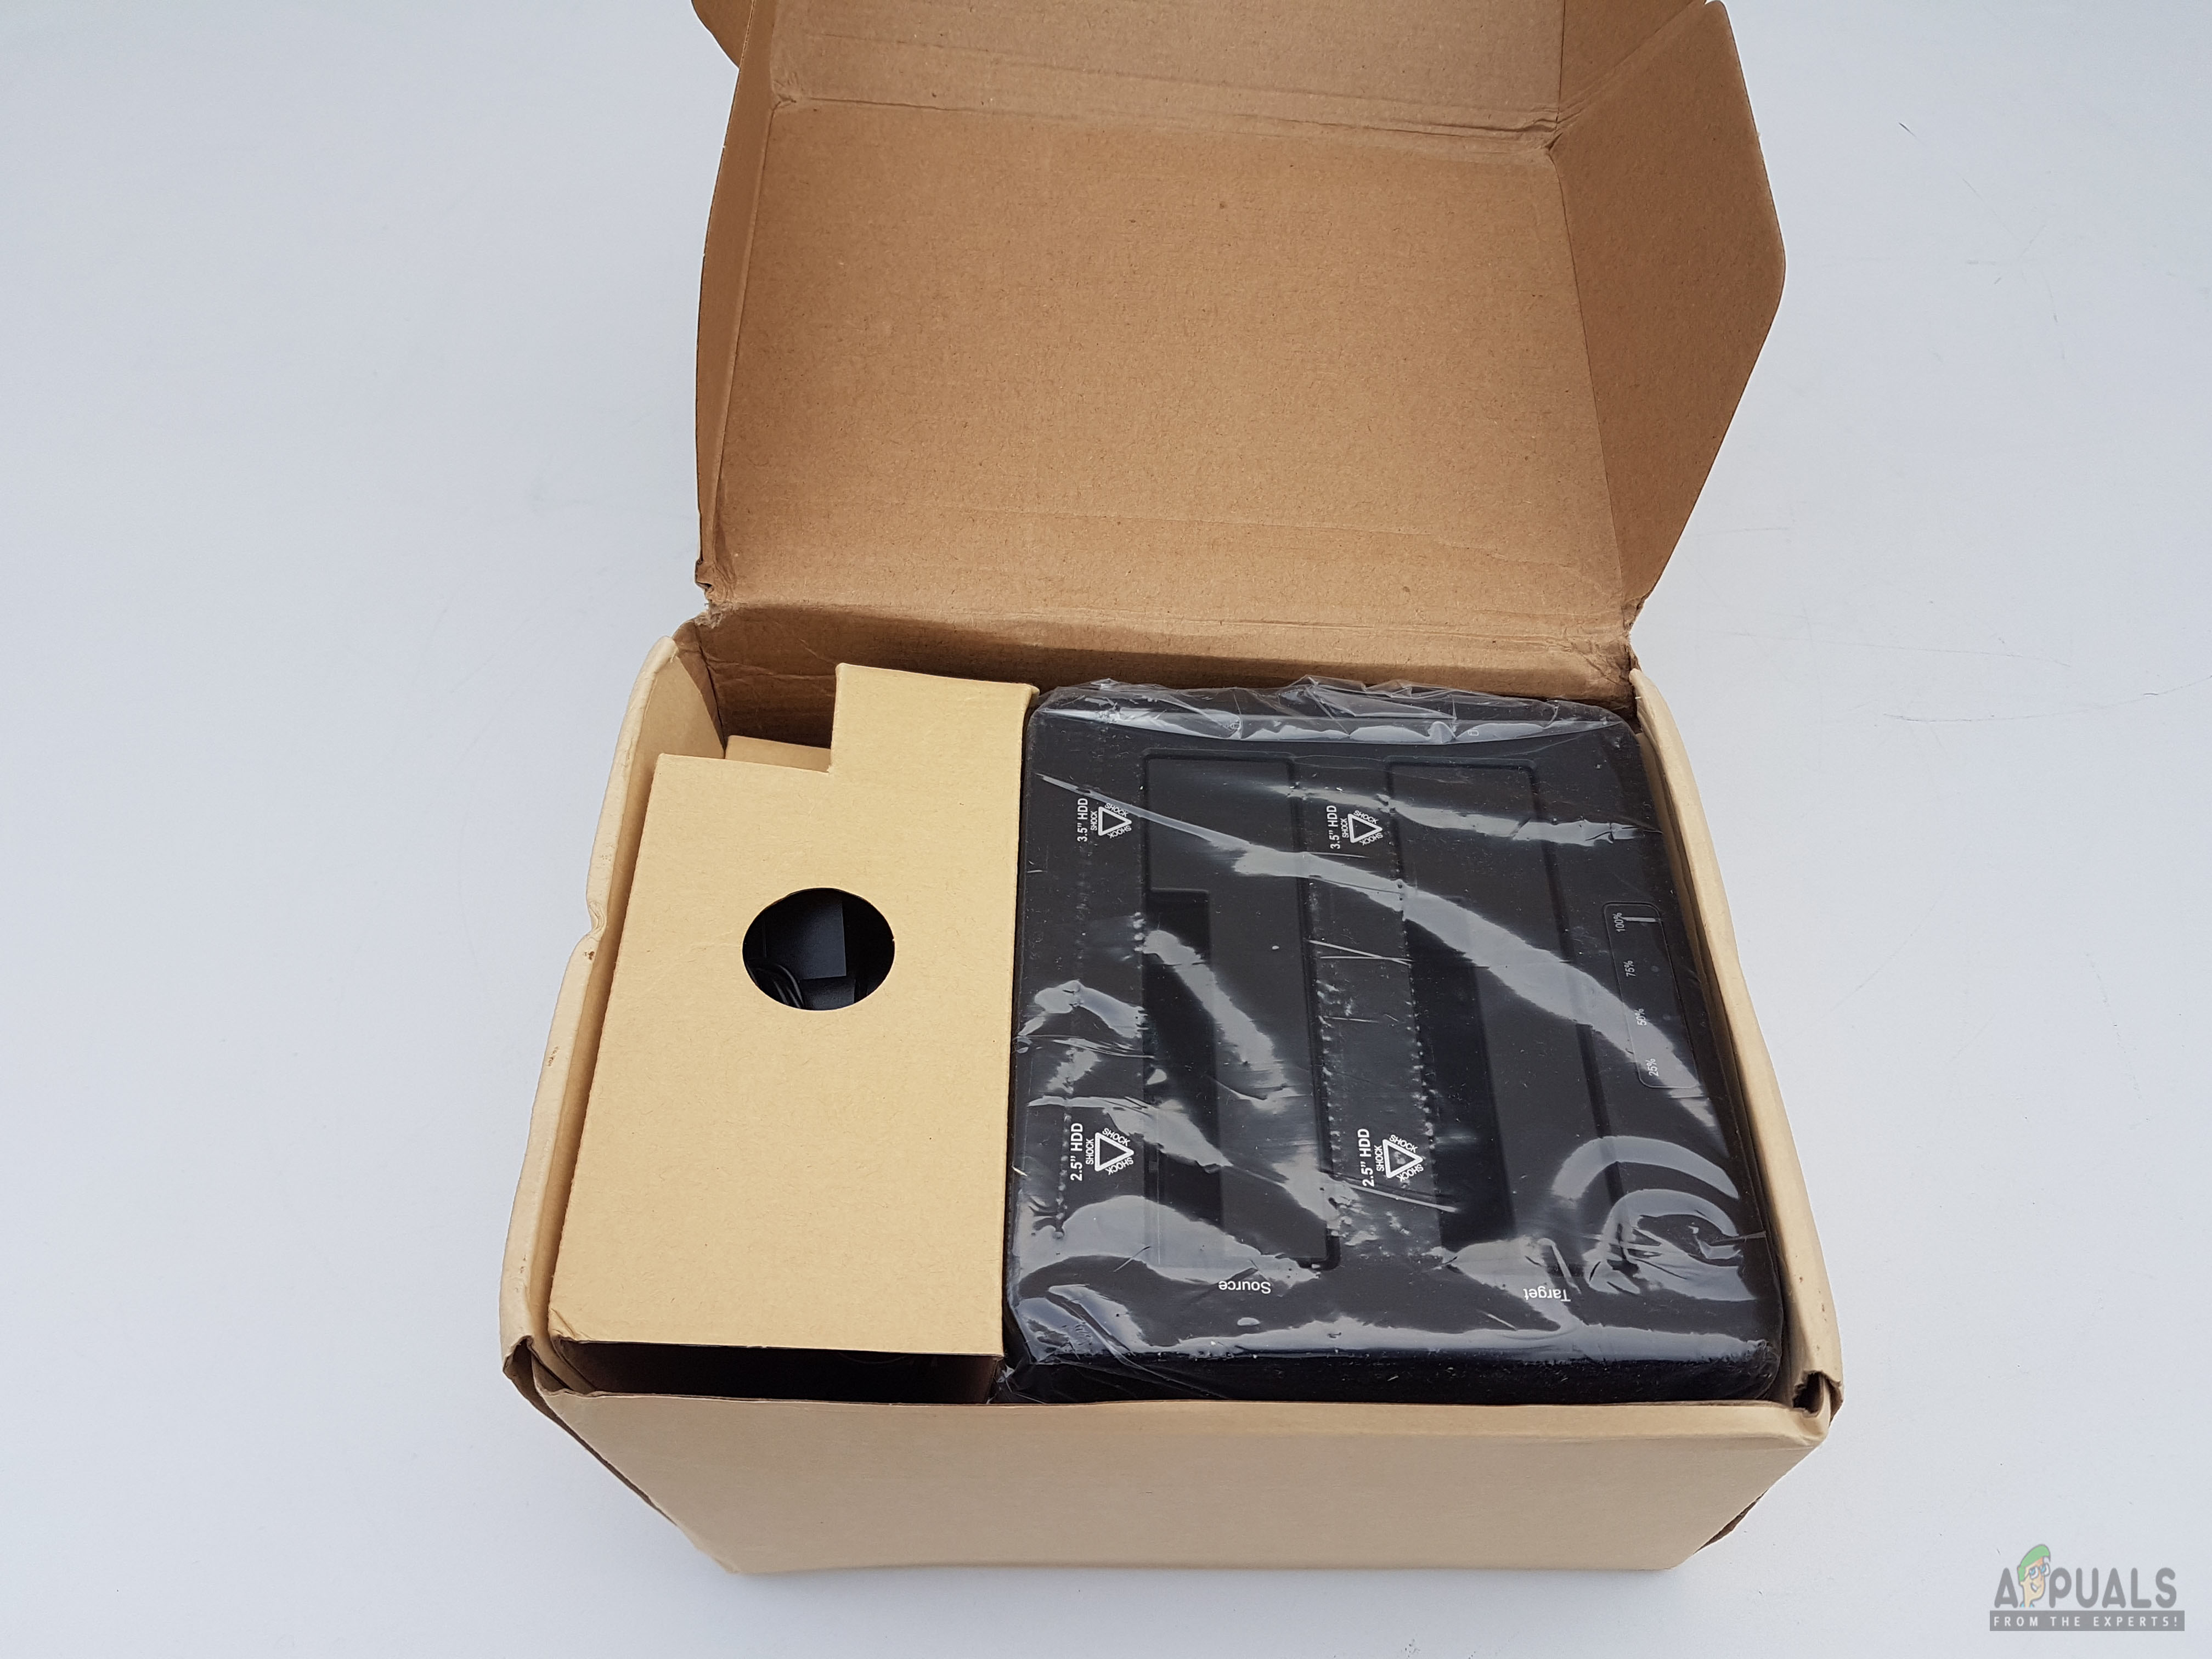
Opening the main box will reveal the dock placed inside a transparent sheet. There is a flap over cover on the left side of the dock. There is an AC power cord underneath it.
Content
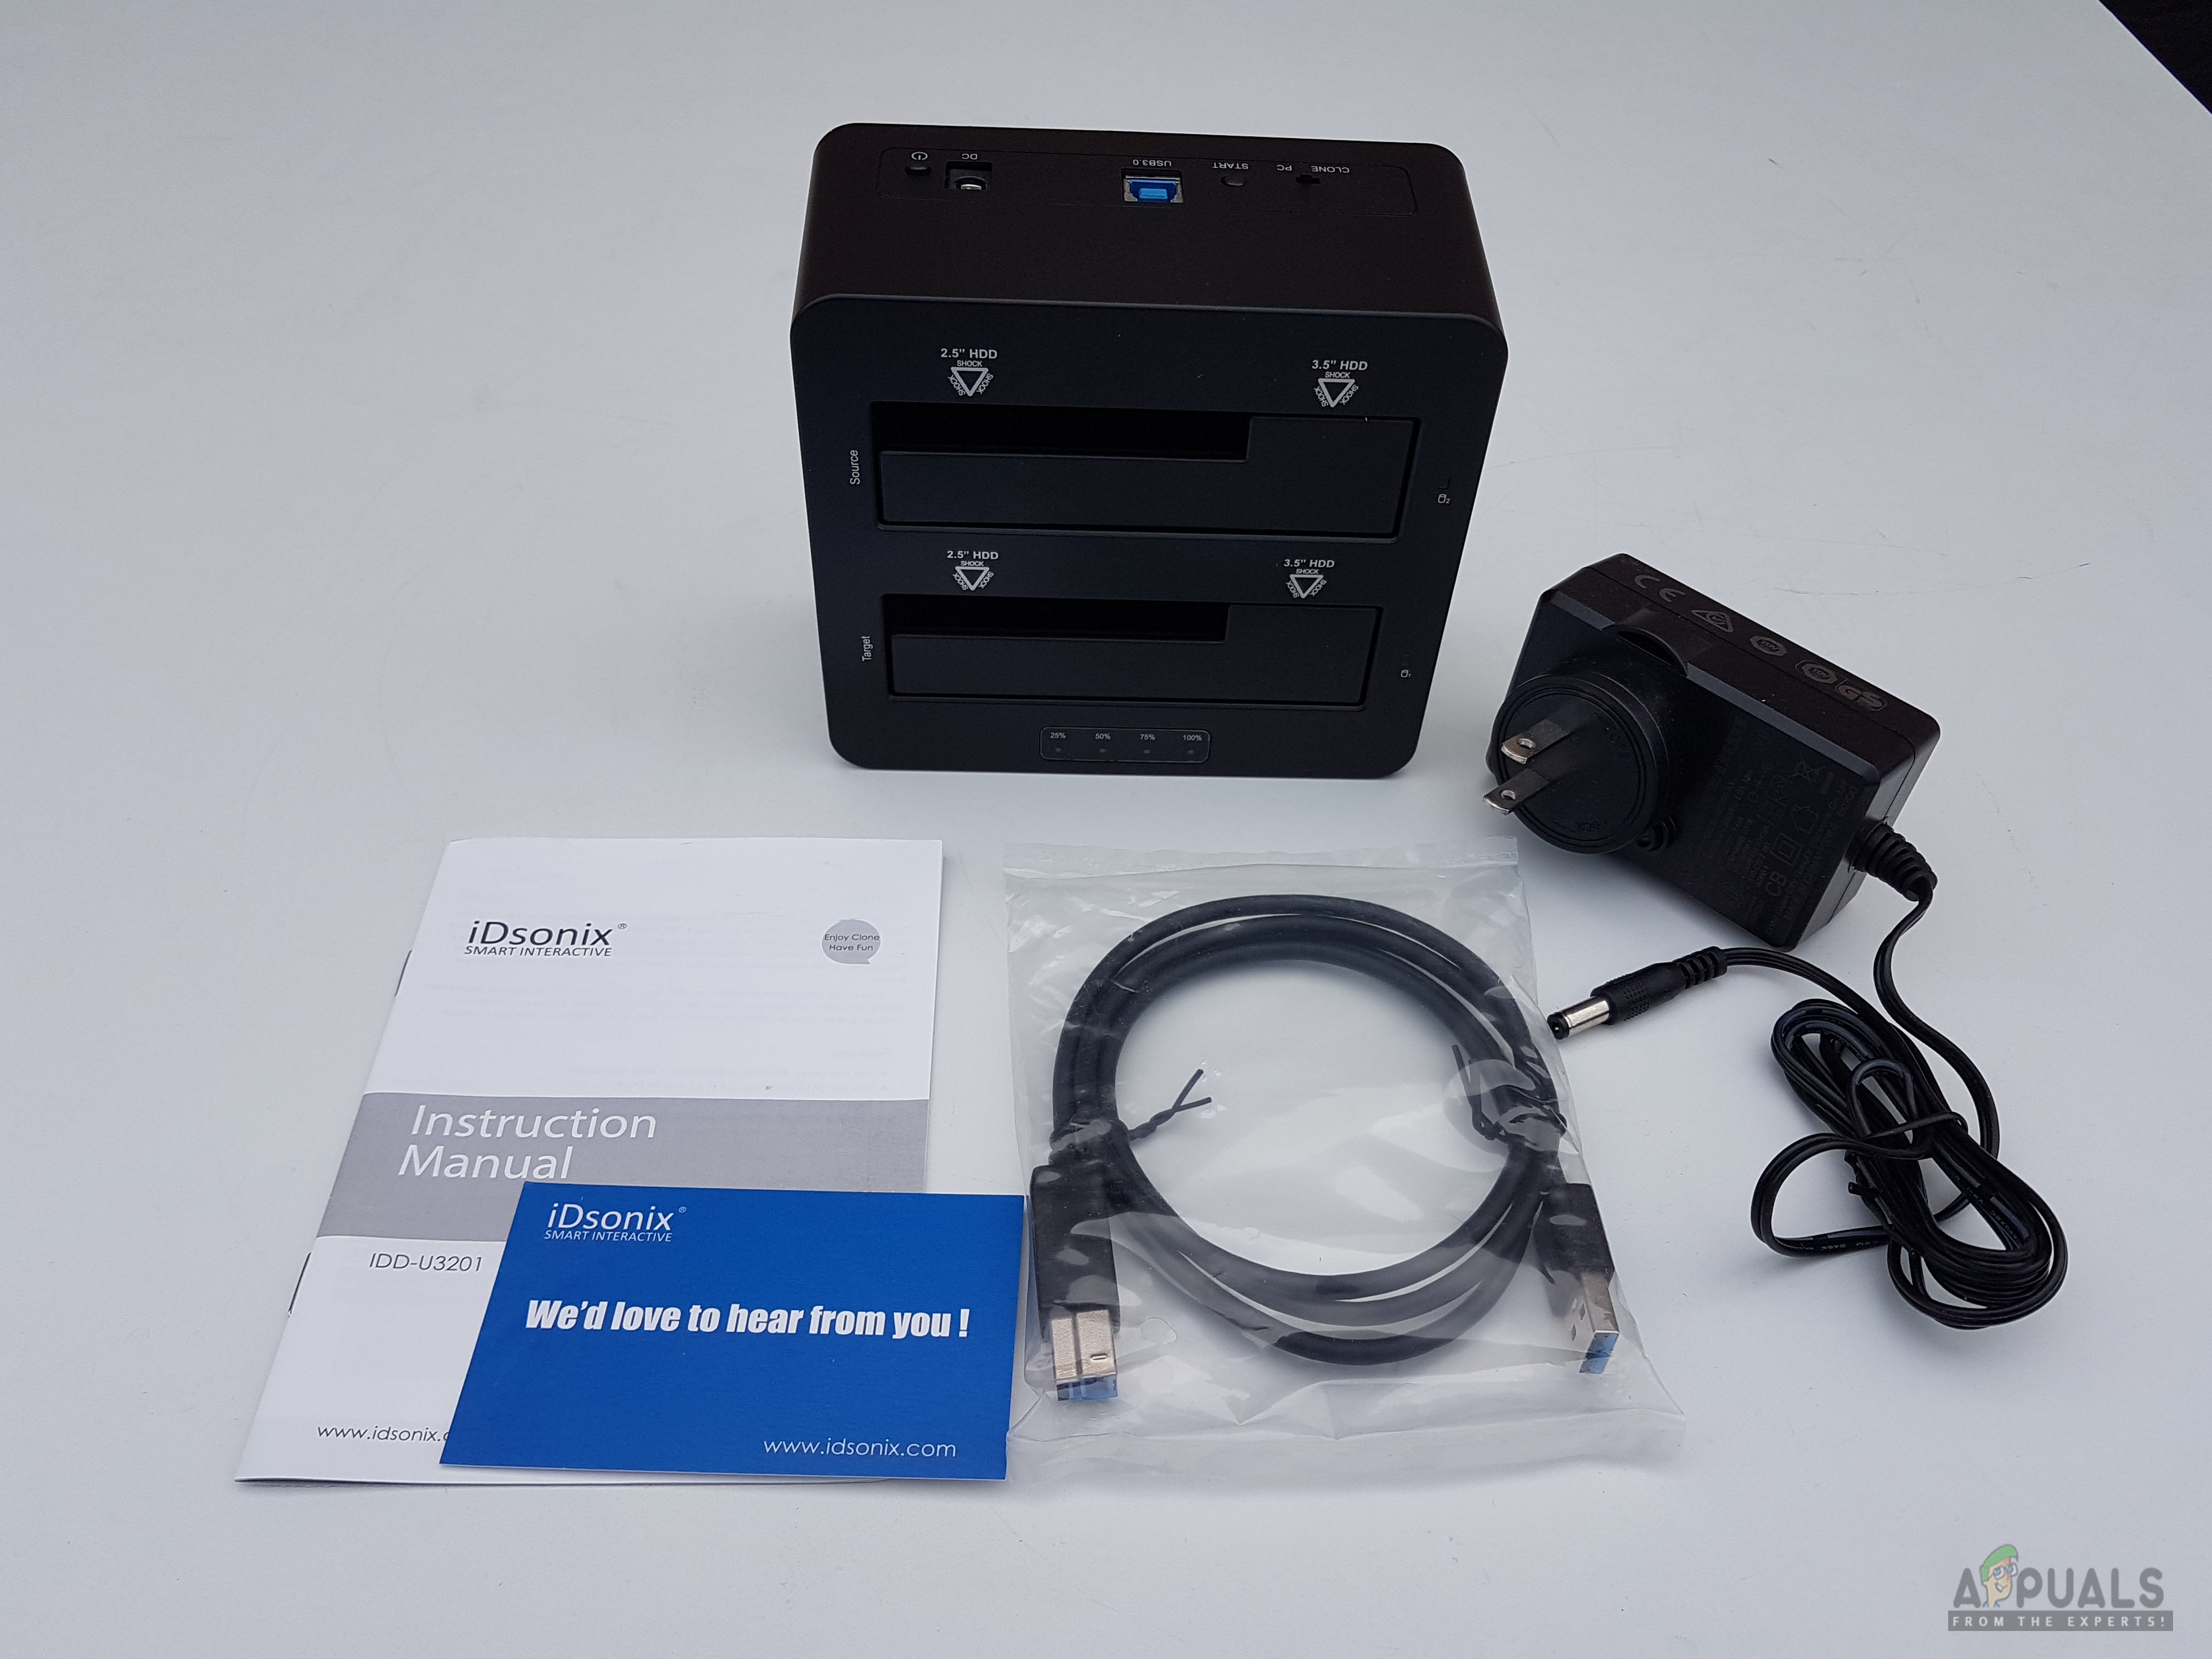
Following is provided with the dock:
1x Dual Bay Docking Station1x AC Power Cord12V 4A Power Adapter3ft USB CableUser ManualAfter-Sale Service Card
Closer Look
It is time to take a closer look at the docking station and see what functionality it offers. Here is what the company is saying about it, “iDsonix™ IDD-U3201 USB3.0 SATA Hard Drive Dual Bay Docking Station offers swappable access to 2.5″ and 3.5″ SATA HDD, without having to mount the hard drive or installing it in an enclosure. iDsonix™ IDD-U3201 provides a simple, fast, and cost-effective solution for data recovery, drive imaging, and testing centers, or any environment that requires fast access to uninstalled/archived drives.” The dimension of the iDsonix™ IDD-U3201 USB3.0 SATA Hard Drive Dual Bay Docking Station is 135x121x65mm. The dock is made of the plastic and our sample comes in the black color. The user can also get it in the white color. It is using UASP protocol using USB 3.0 interface. The theoretical speed of the USB 3.0 is 5.0 Gbps so there is that. Why I wrote the theoretical? It is because the USB ports on the motherboard use shared resources of the motherboard aka PCIe lanes. The actual speed would vary depending upon the no of connected USB drives and available lanes. The dock supports Windows XP and above OS, Linux, and MAC. There is no driver needed to operate the dock because it is plug-n-play. It is that simple to use. I did not even need the user manual to operate it.
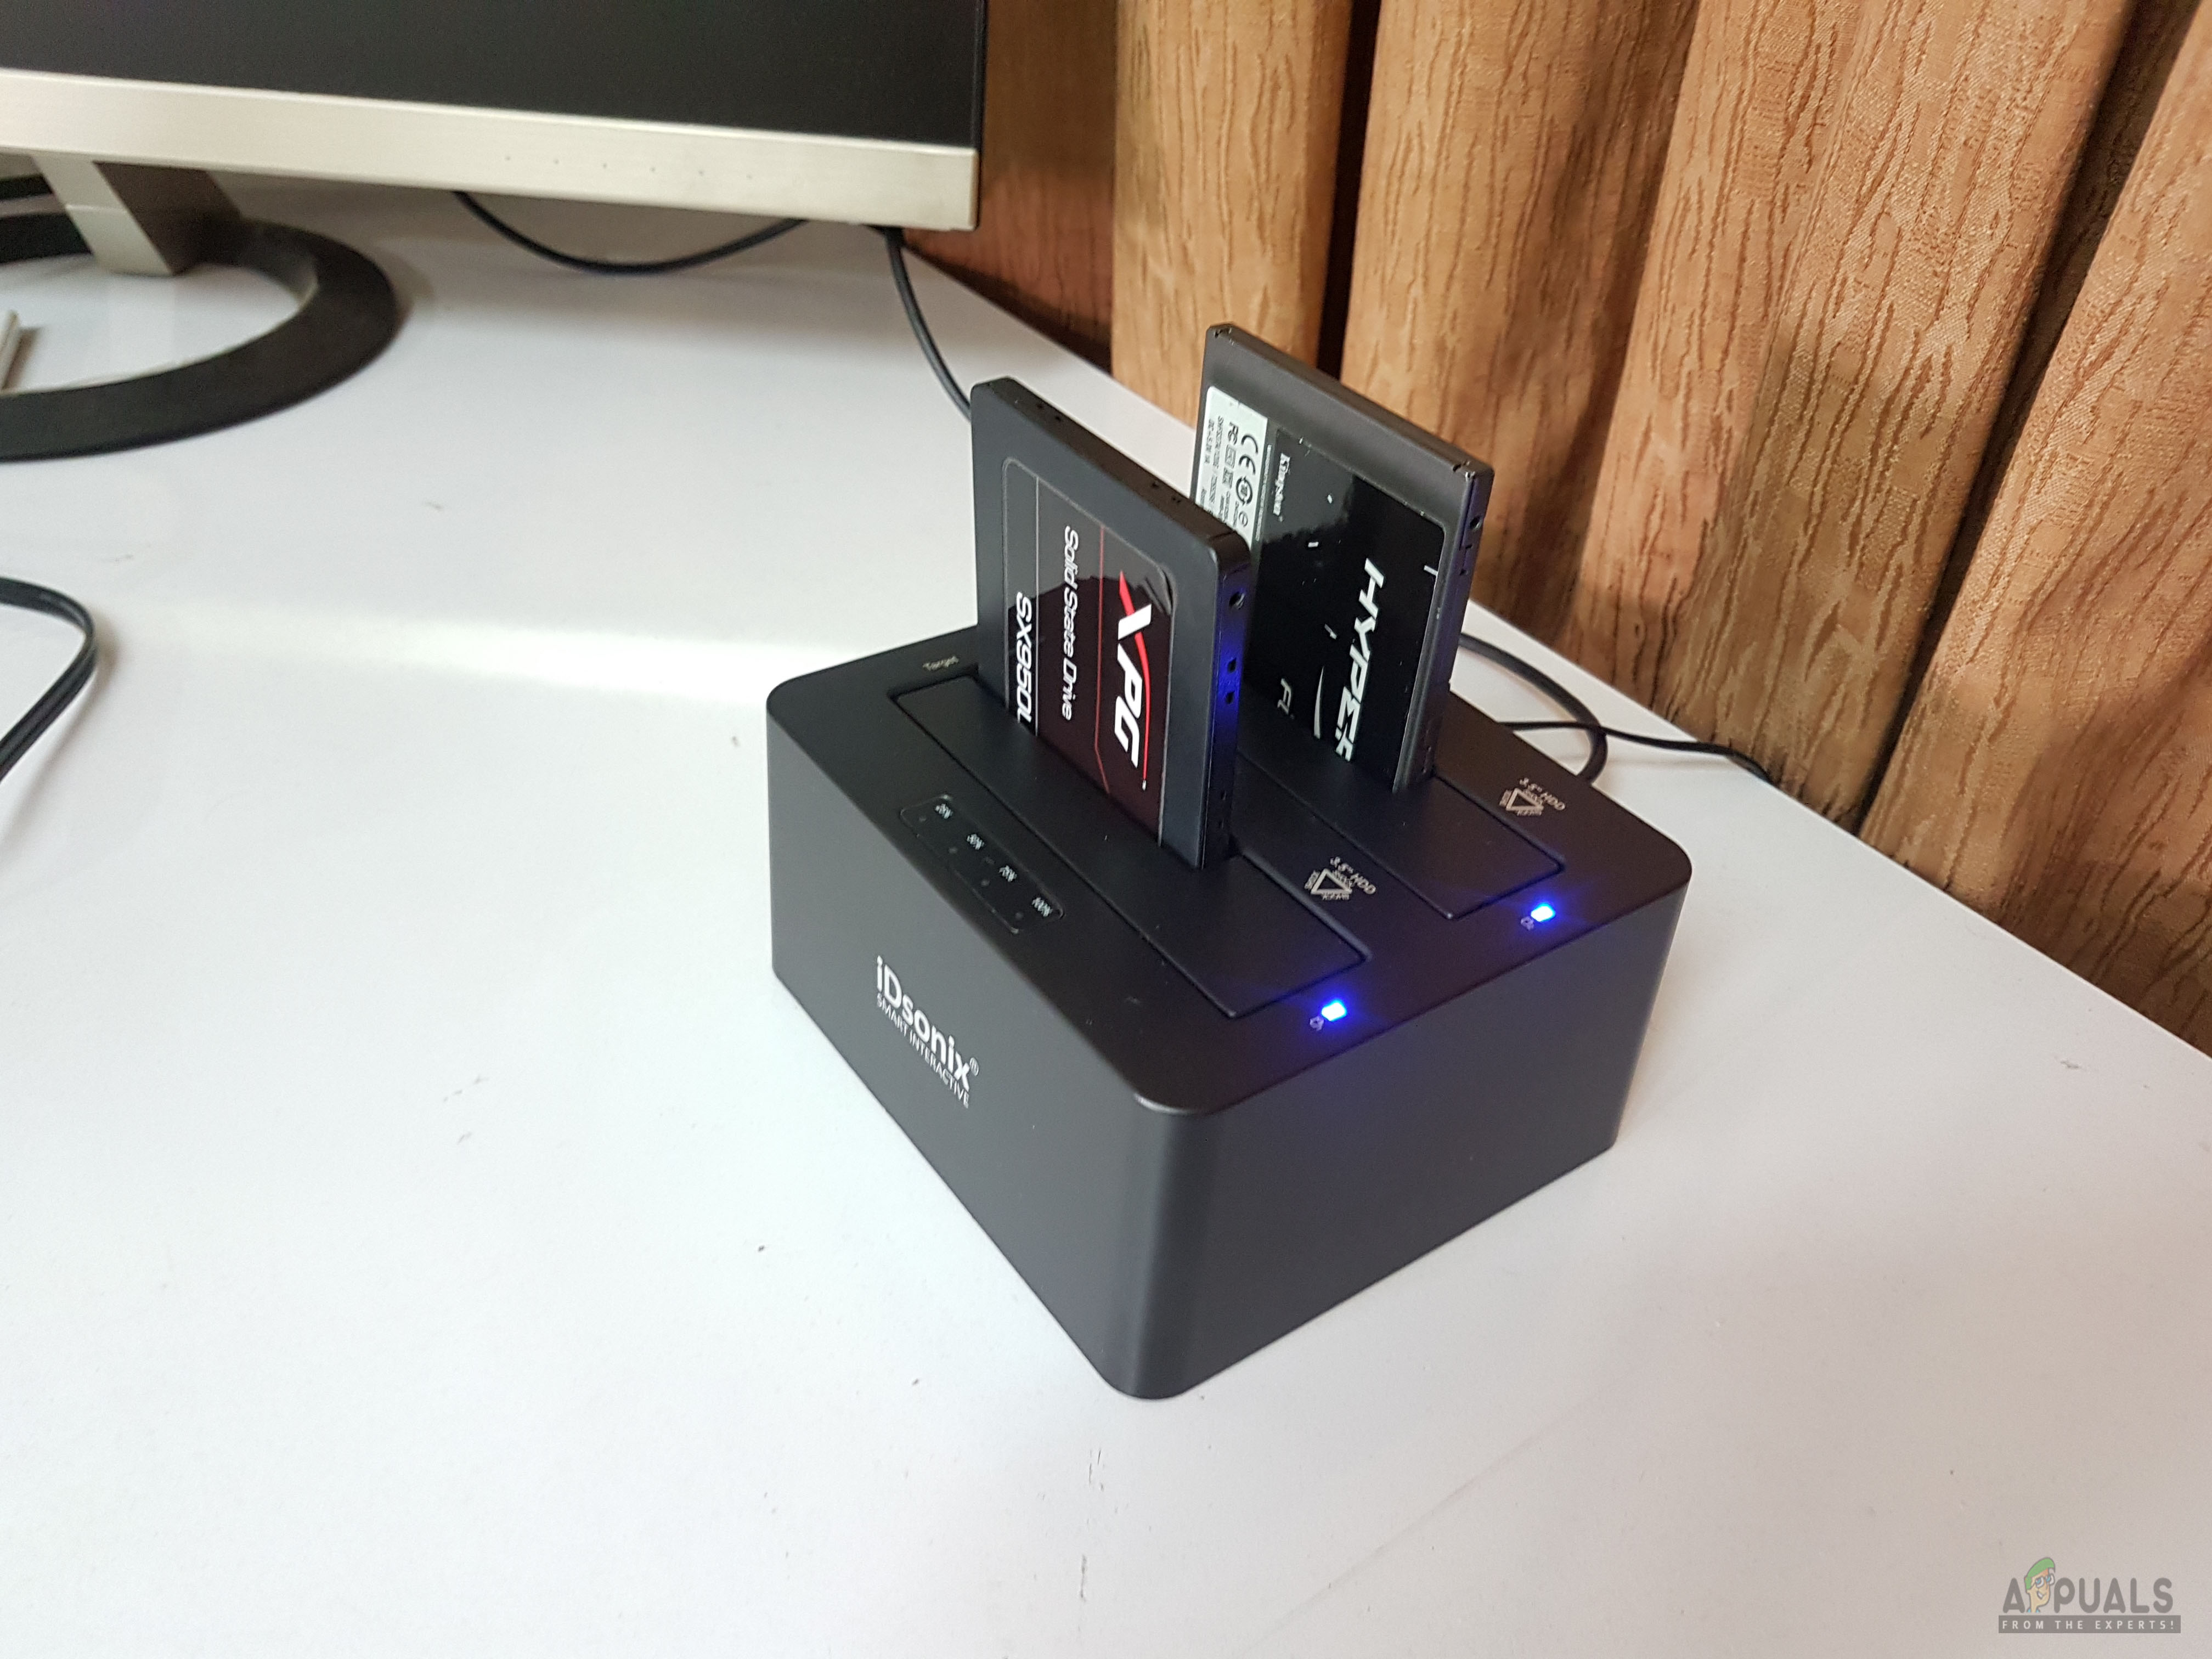
Taking a look at the top side of the iDsonix™ IDD-U3201 USB3.0 SATA Hard Drive Dual Bay Docking Station, There are two drive bays. The top is labeled as Source and the bottom is labeled as Target. This is critical information for the user who would be cloning the drives on this dock. The user can just simply read the labels and know which drive to put in which bay. Another important design aspect is the labeling of a 2.5” HDD and 3.5” HDD. Looking closely, you will notice that the 2.5” HDD area is not covered. The user is supposed to slide the 2.5” HDD/SSD in and call it a day as the rest of the bay has a cover. This is a smart move by the iDsonix. For 3.5” HDD, the user will need to place the drive through the bay cover. The bay cover is spring-loaded and is pressed inwards. There are two LED indicators on the right side of each bay. They light up in the blue color when the drive is plugged in and the dock is connected to the PC. During the activity, these indicator LEDs turn blue and red alternatively quickly.
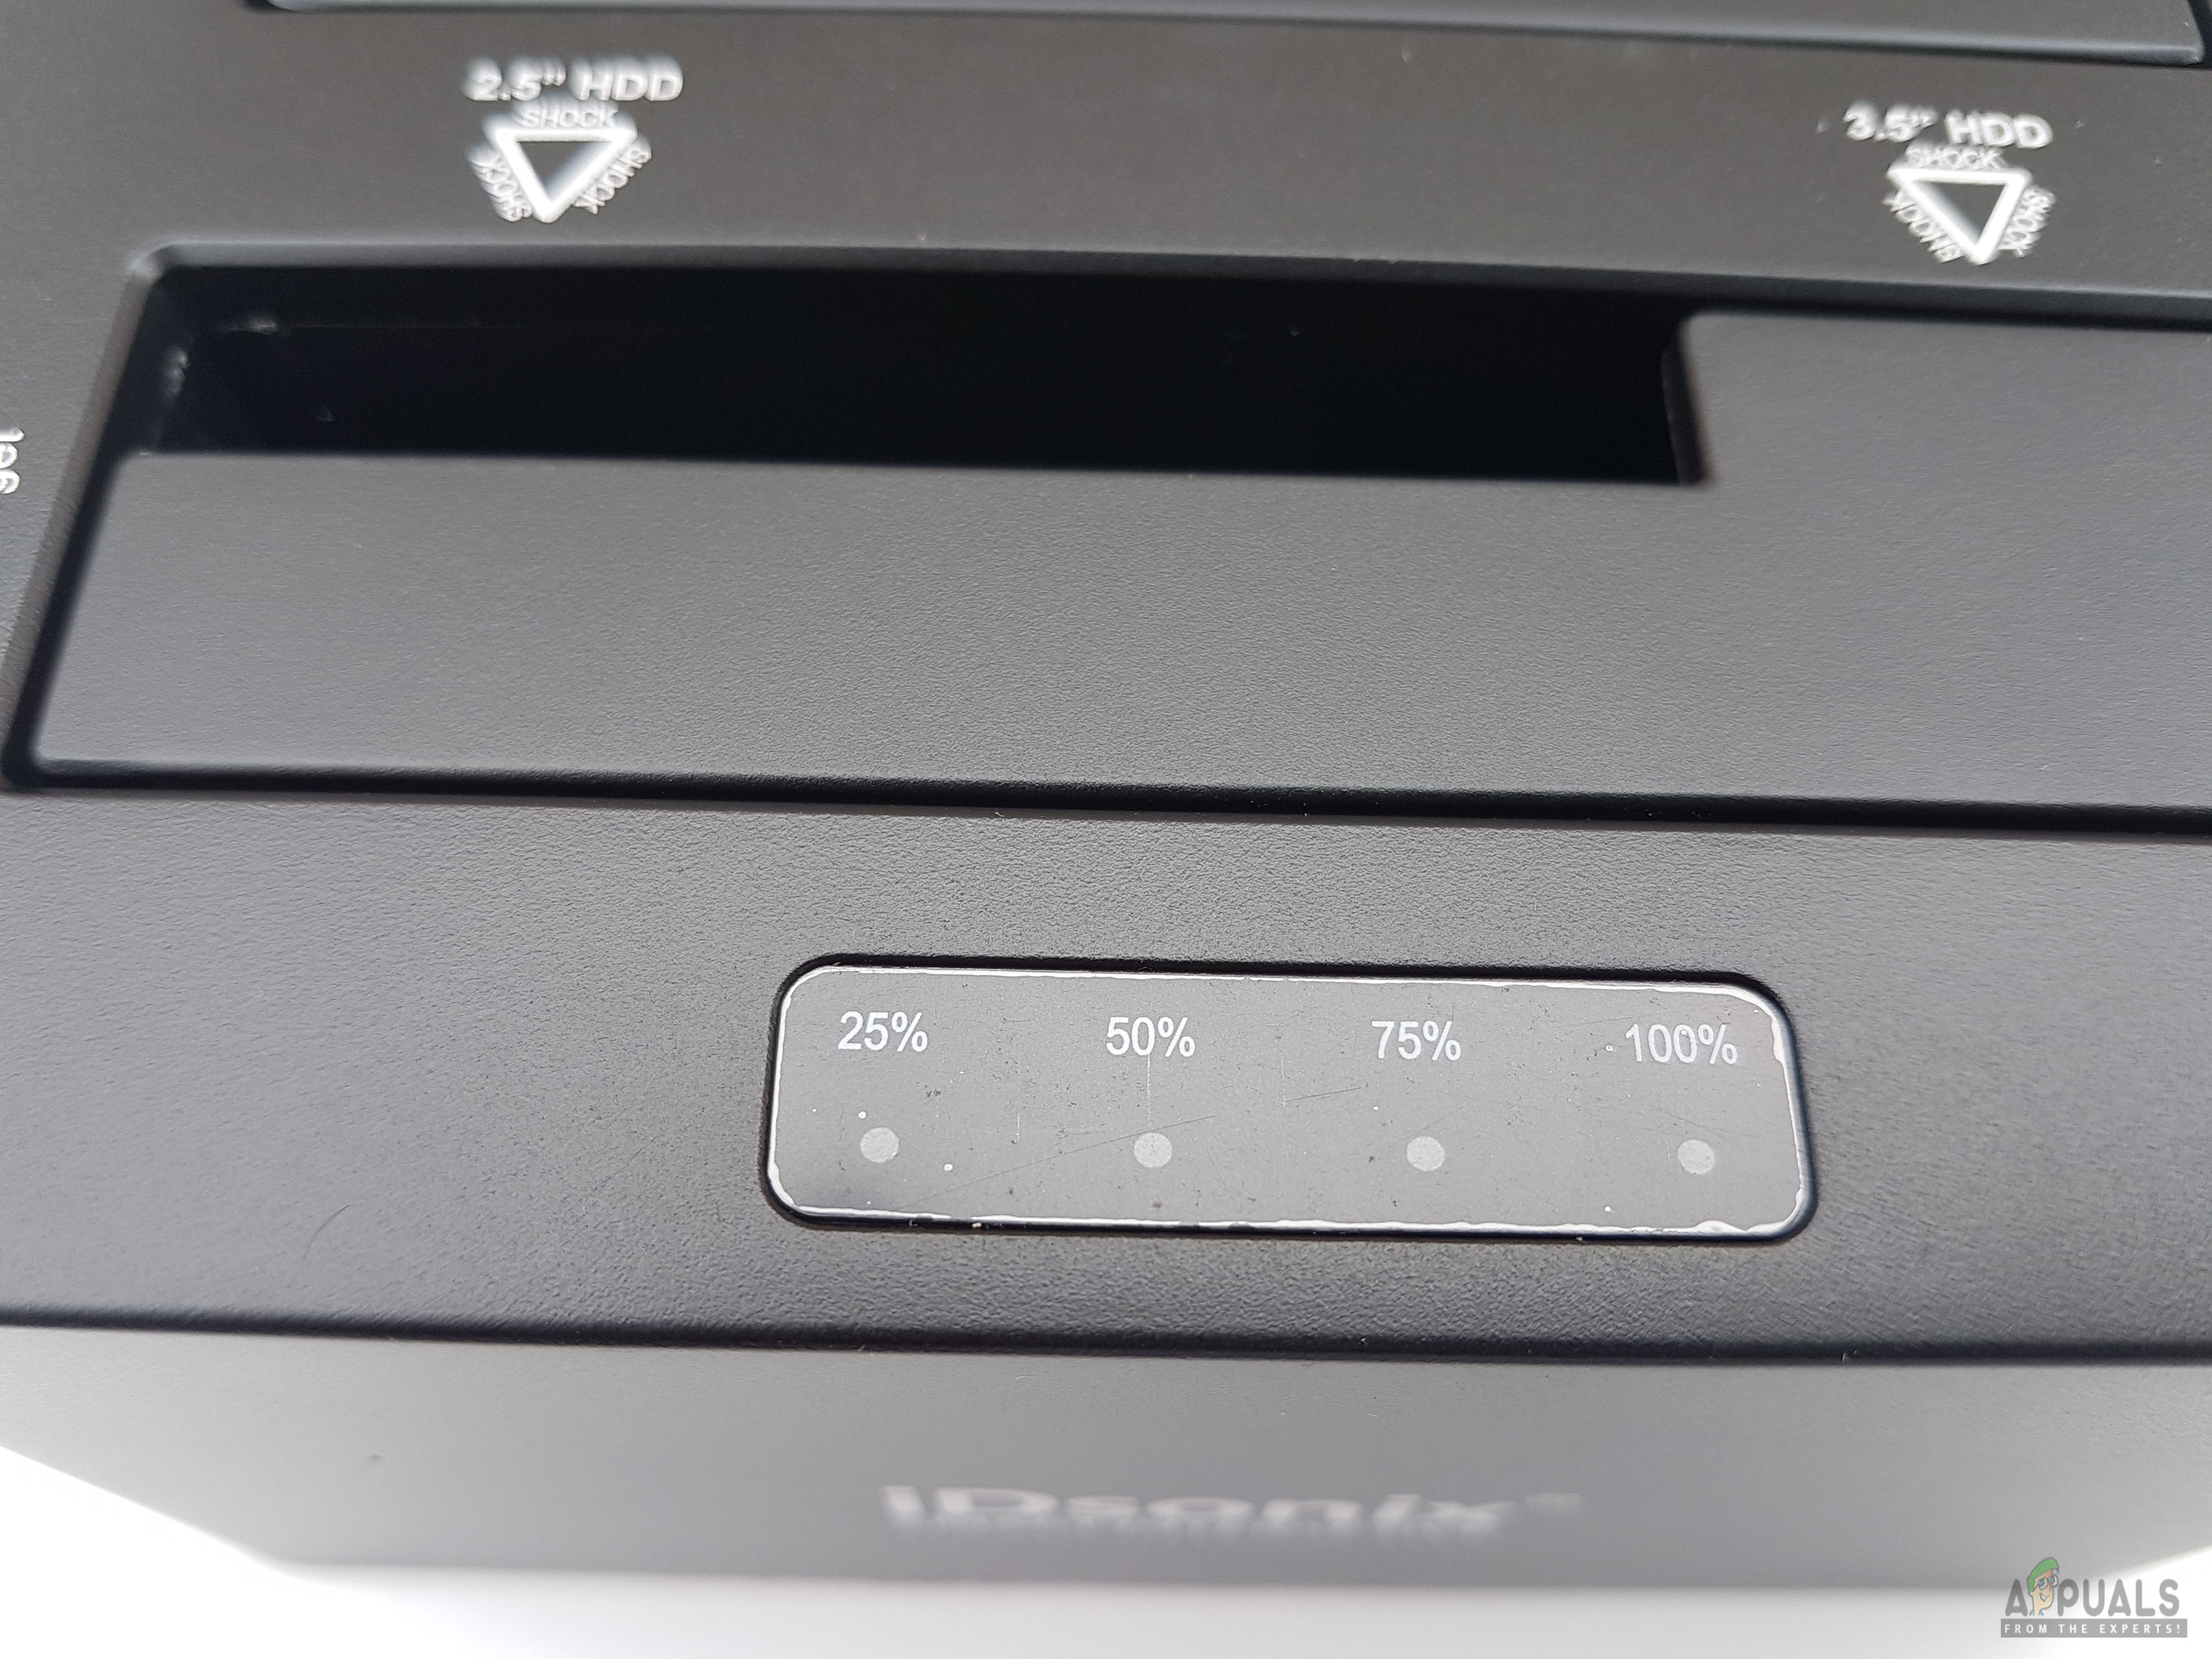
At the bottom, there are 4 LED indicators. They light up in the blue color. They show the percentage completion of the cloning operation. Initially, all 4 LEDs blink. As soon as 25% of the cloning process is completed, the LED of 25% would remain static blue and the rest of the LEDs will continue blinking. This is repeated until the cloning is 100% completed. We don’t need any software and connectivity to the PC for the cloning operation. It is all taken care of by the manufacturer at the hardware level. The cloning process is Disk-to-Disk, not File-to-File.
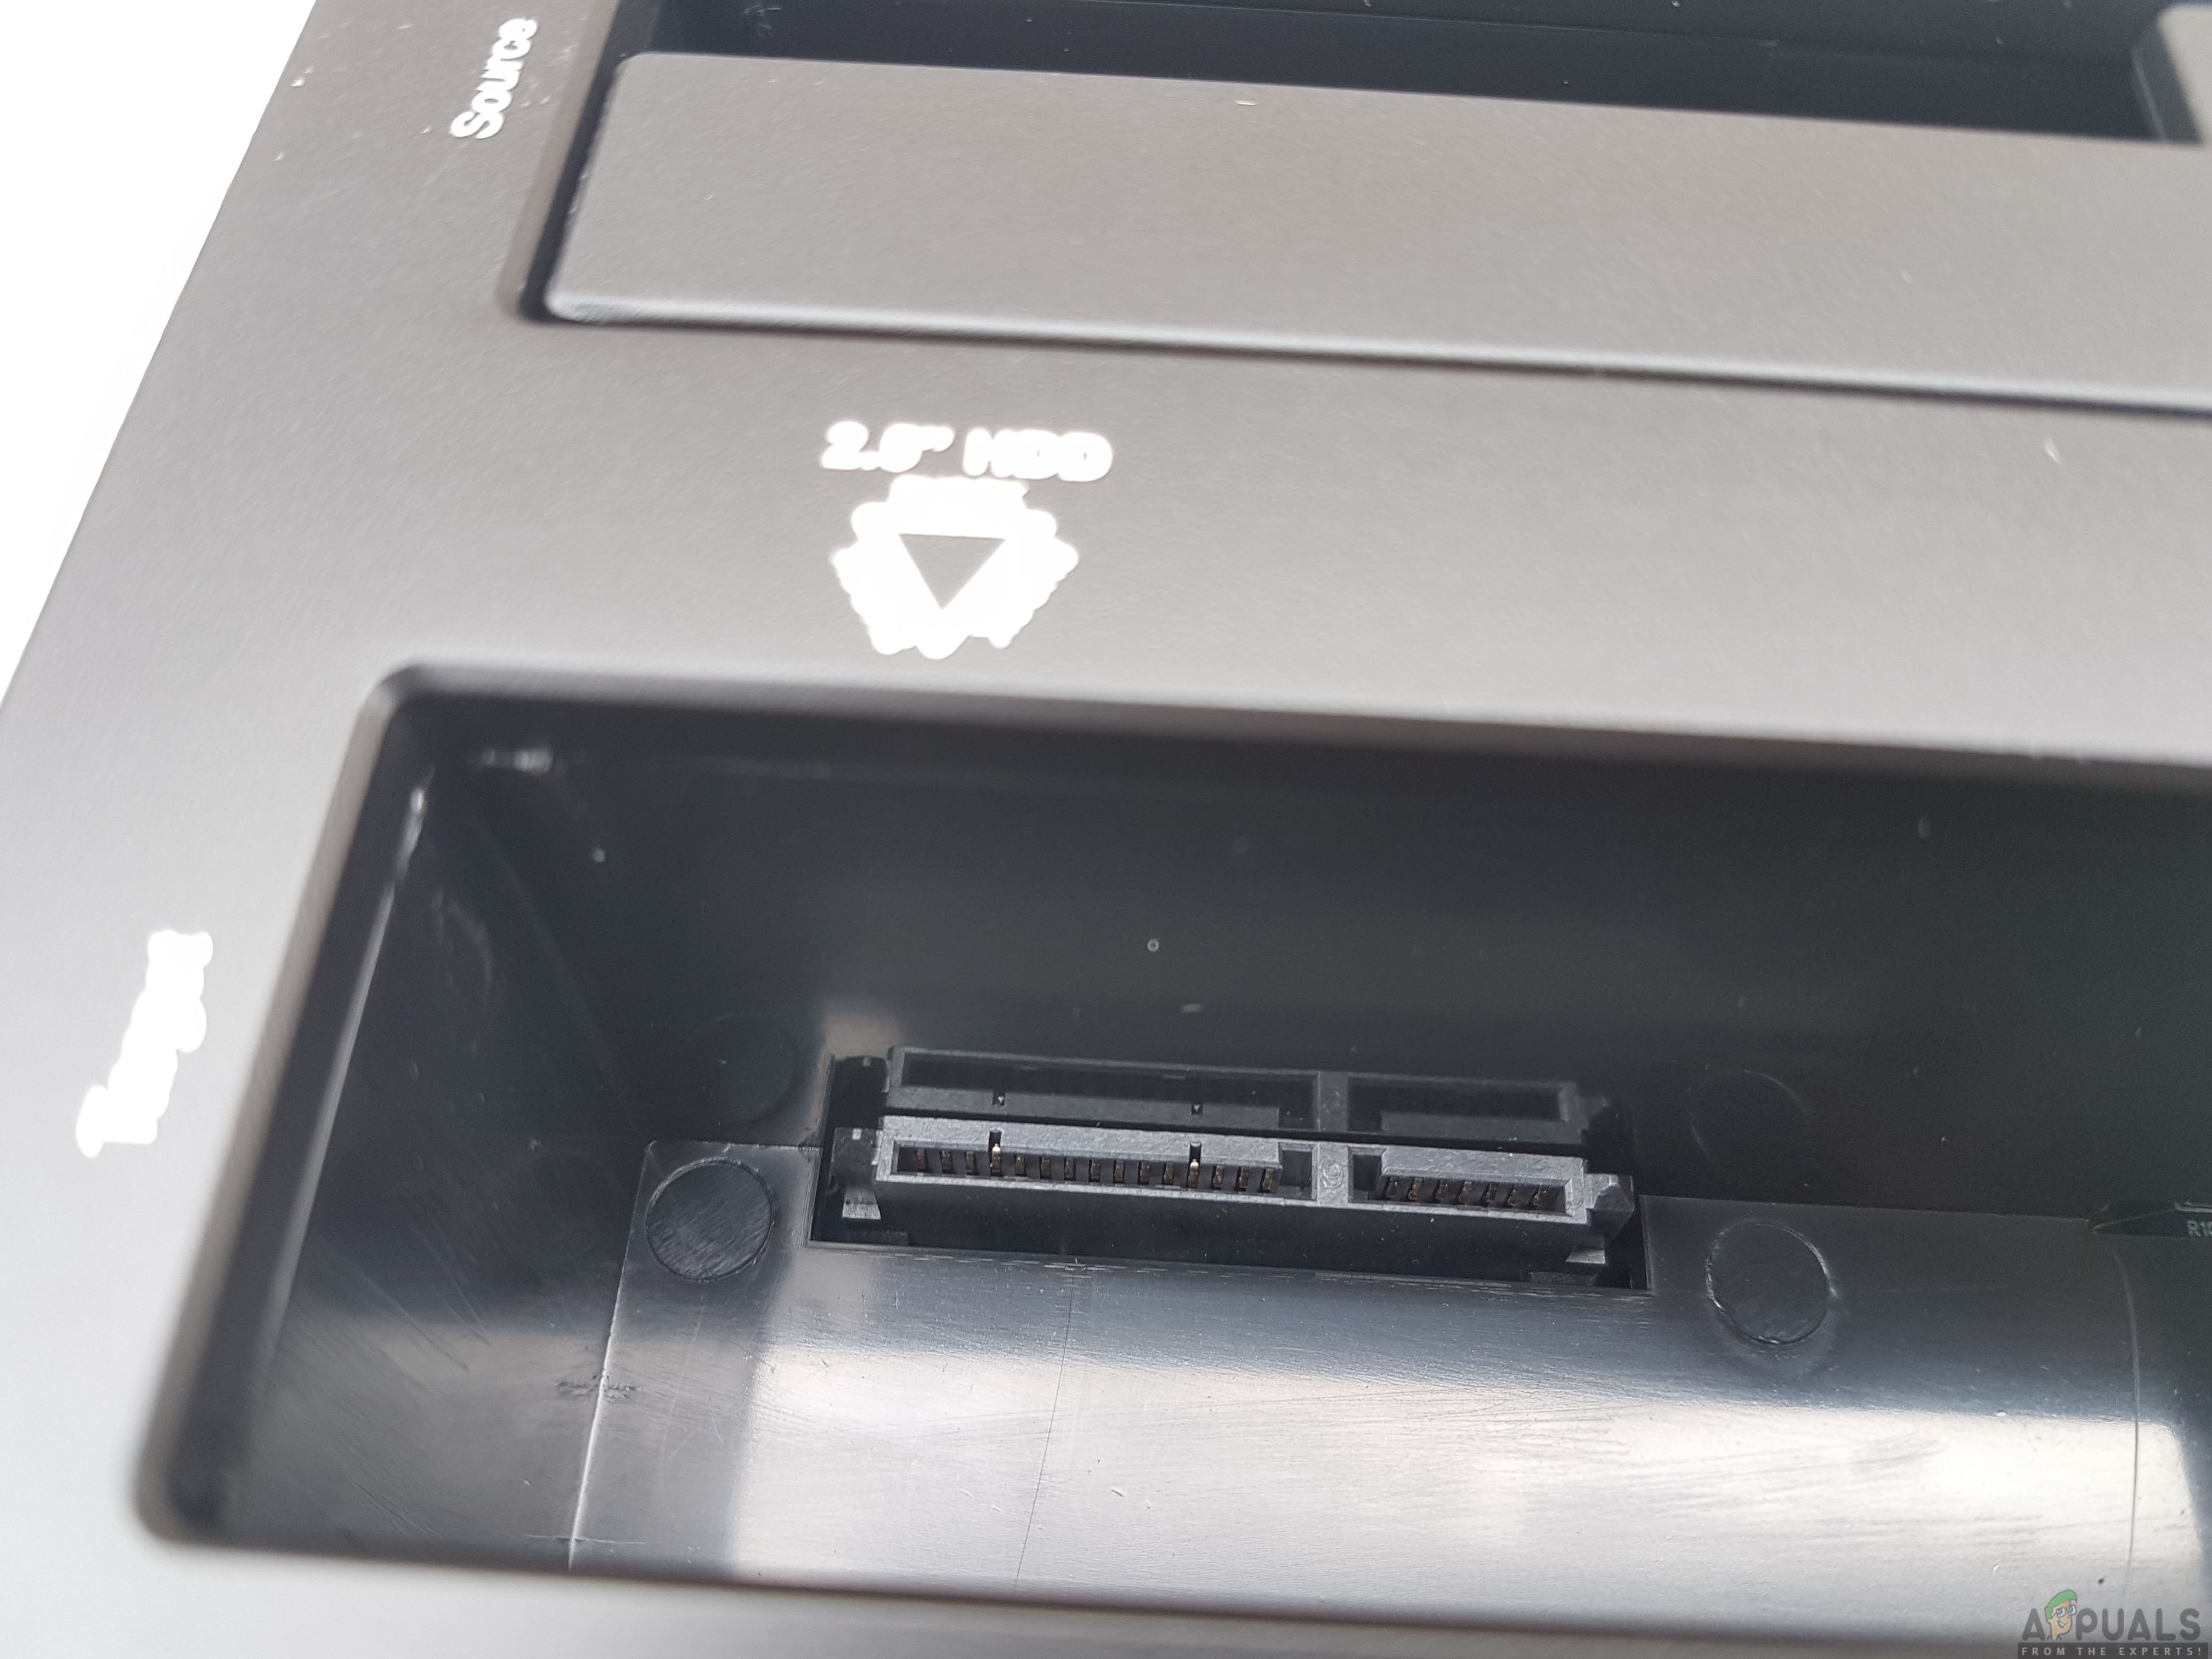
The above picture shows a close up of the SATA ports in the bay. Apparently, the dock does not support the hot-swap.
The front side of the iDsonix™ IDD-U3201 USB3.0 SATA Hard Drive Dual Bay Docking Station has iDsonix SMART INTERACTIVE printed in the white color.
The left and right sides of the iDsonix™ IDD-U3201 USB3.0 SATA Hard Drive Dual Bay Docking Station are plain and without any branding or printing. The overall finish is matte black and takes note that it is a fingerprint magnet somehow.
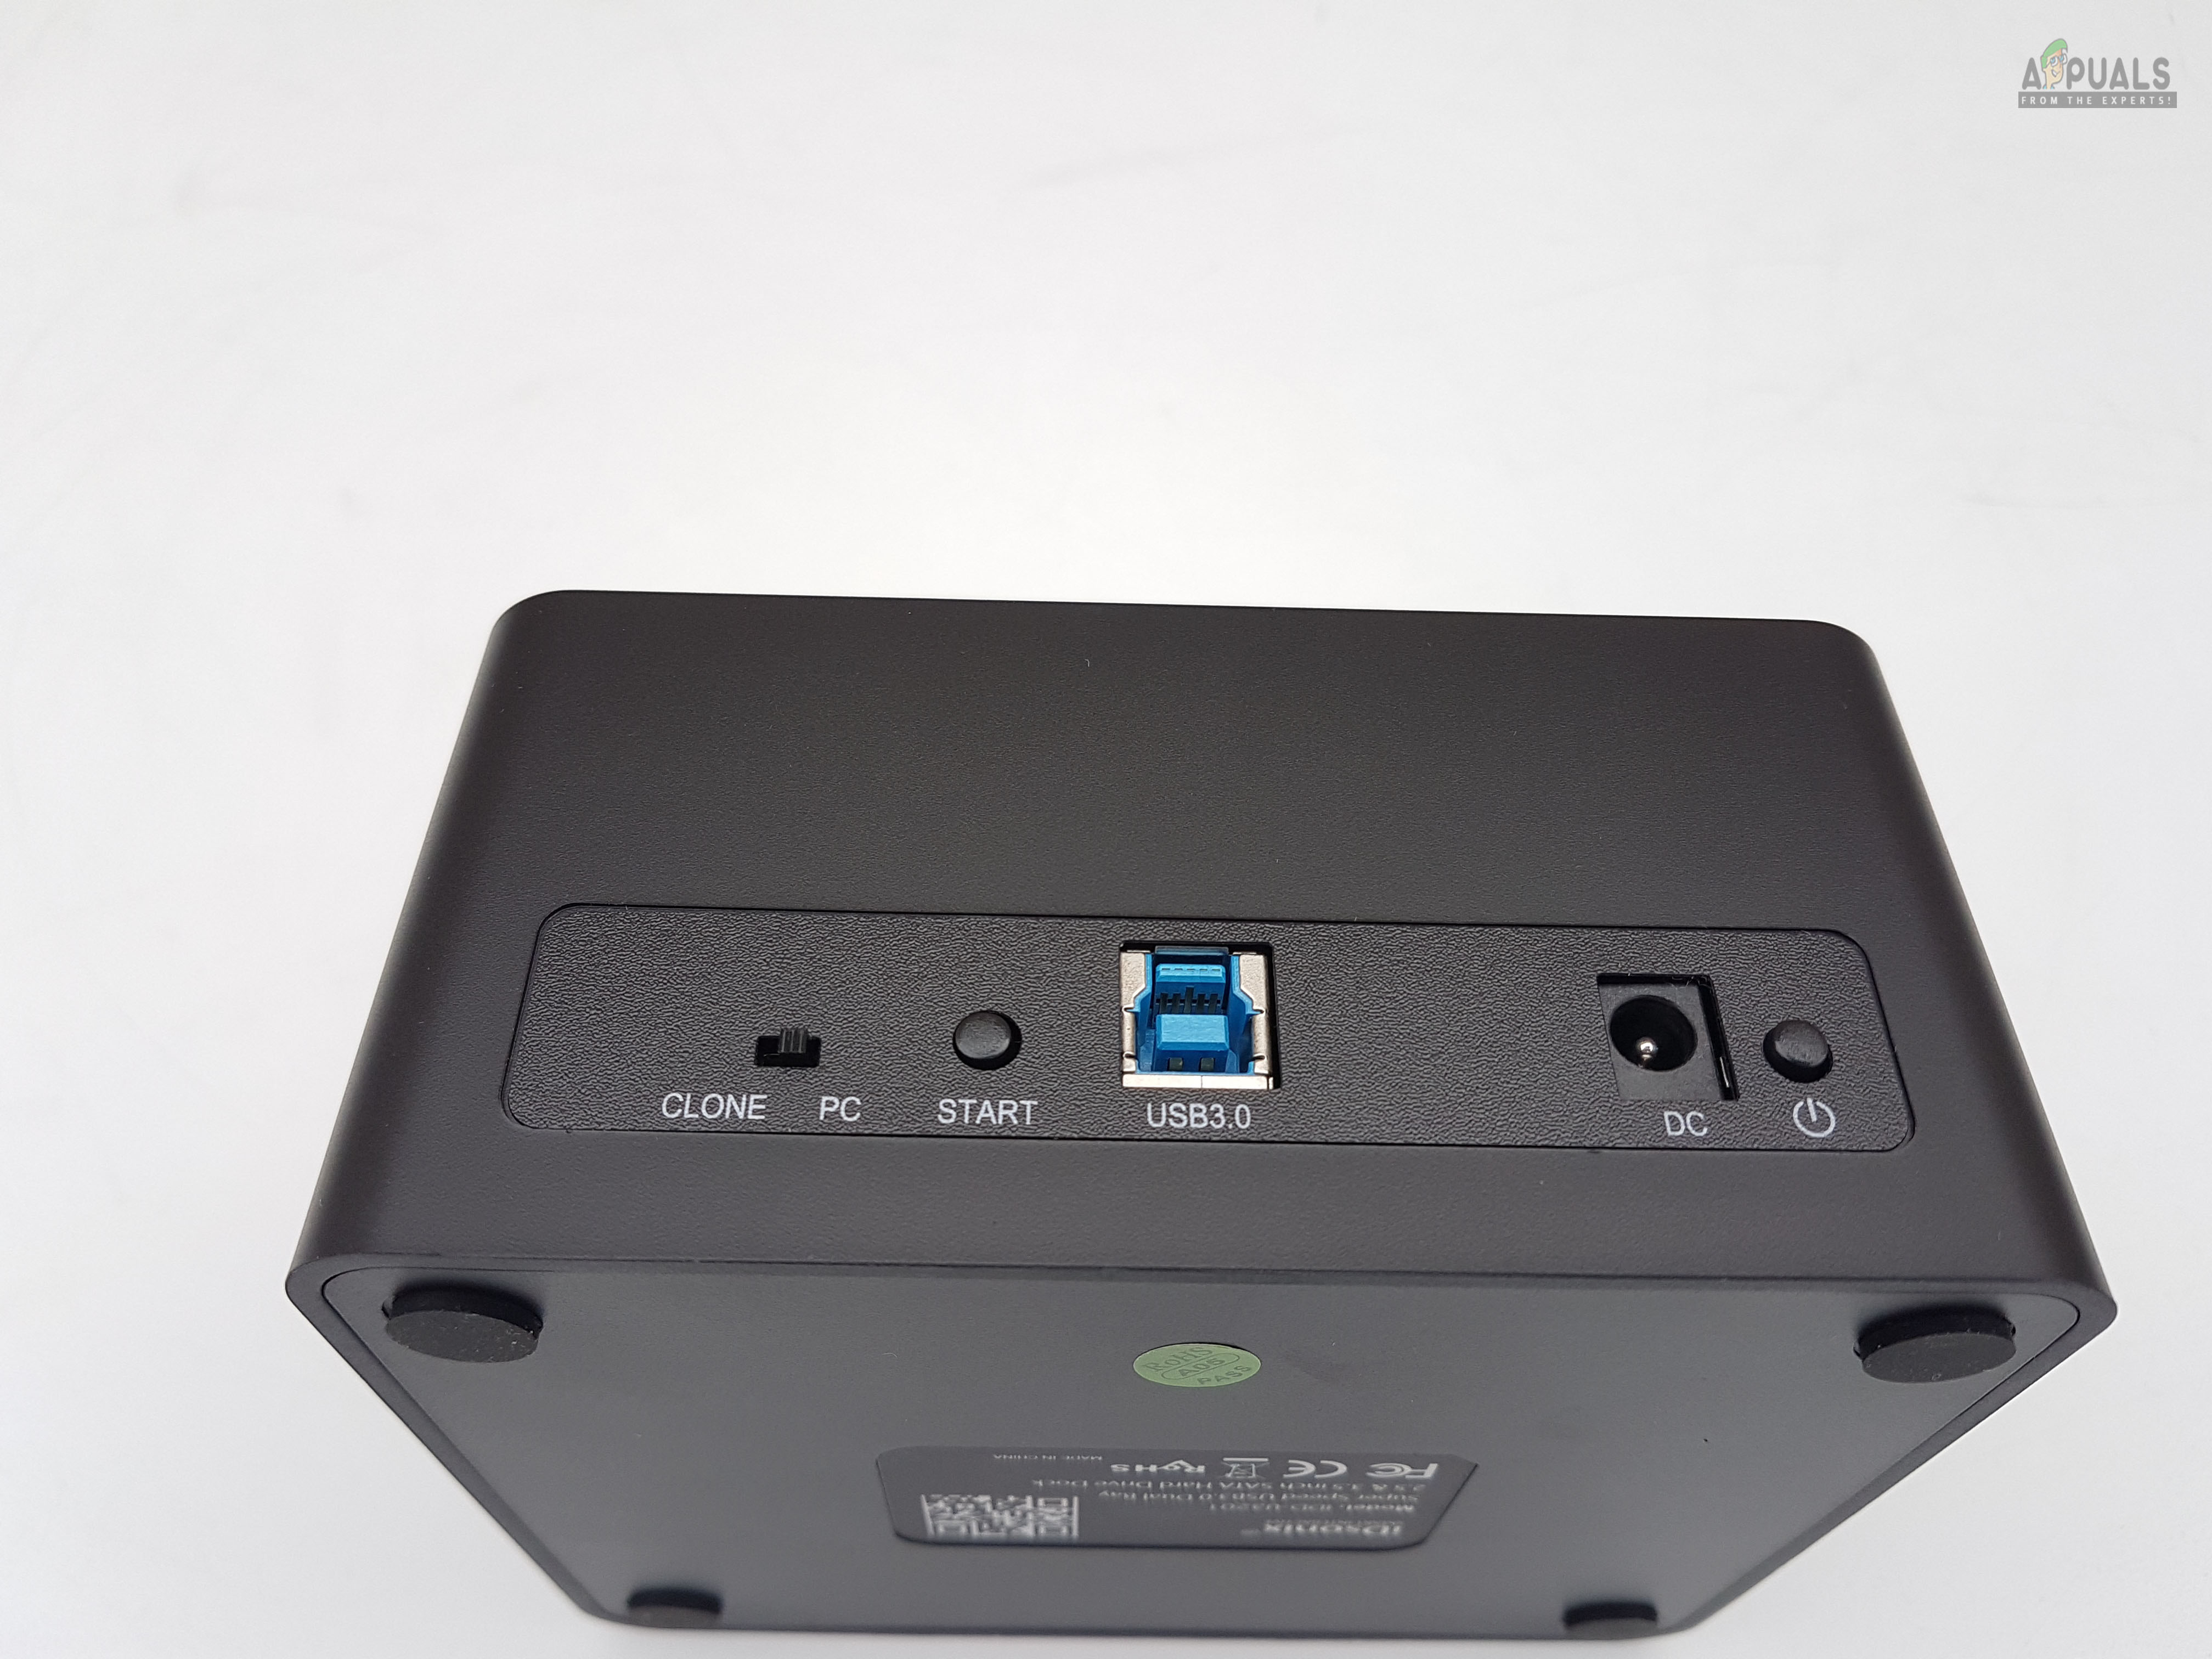
It is time to take a look at the connectivity options of the iDsonix™ IDD-U3201 USB3.0 SATA Hard Drive Dual Bay Docking Station. Starting from the right side, we have a power off/on button. Press it once to turn on or off the dock. Then there is a DC port where the AC power cord will connect to. Next, we have a USB 3.0 port. Then there is a Start button. This button is only for the Cloning operation and should not be used when the dock is connected to the PC and is in PC mode. At the far left, there is a slider button. On its left Clone is printed and on its right PC is printed. Slide the button towards PC if you want to use the dock as an external USB enclosure for on-the-go access to your data. Slide it towards the Clone if you want to clone the drives. Please, keep in mind to set the slider button first before powering the dock else you may not get the desired operation.
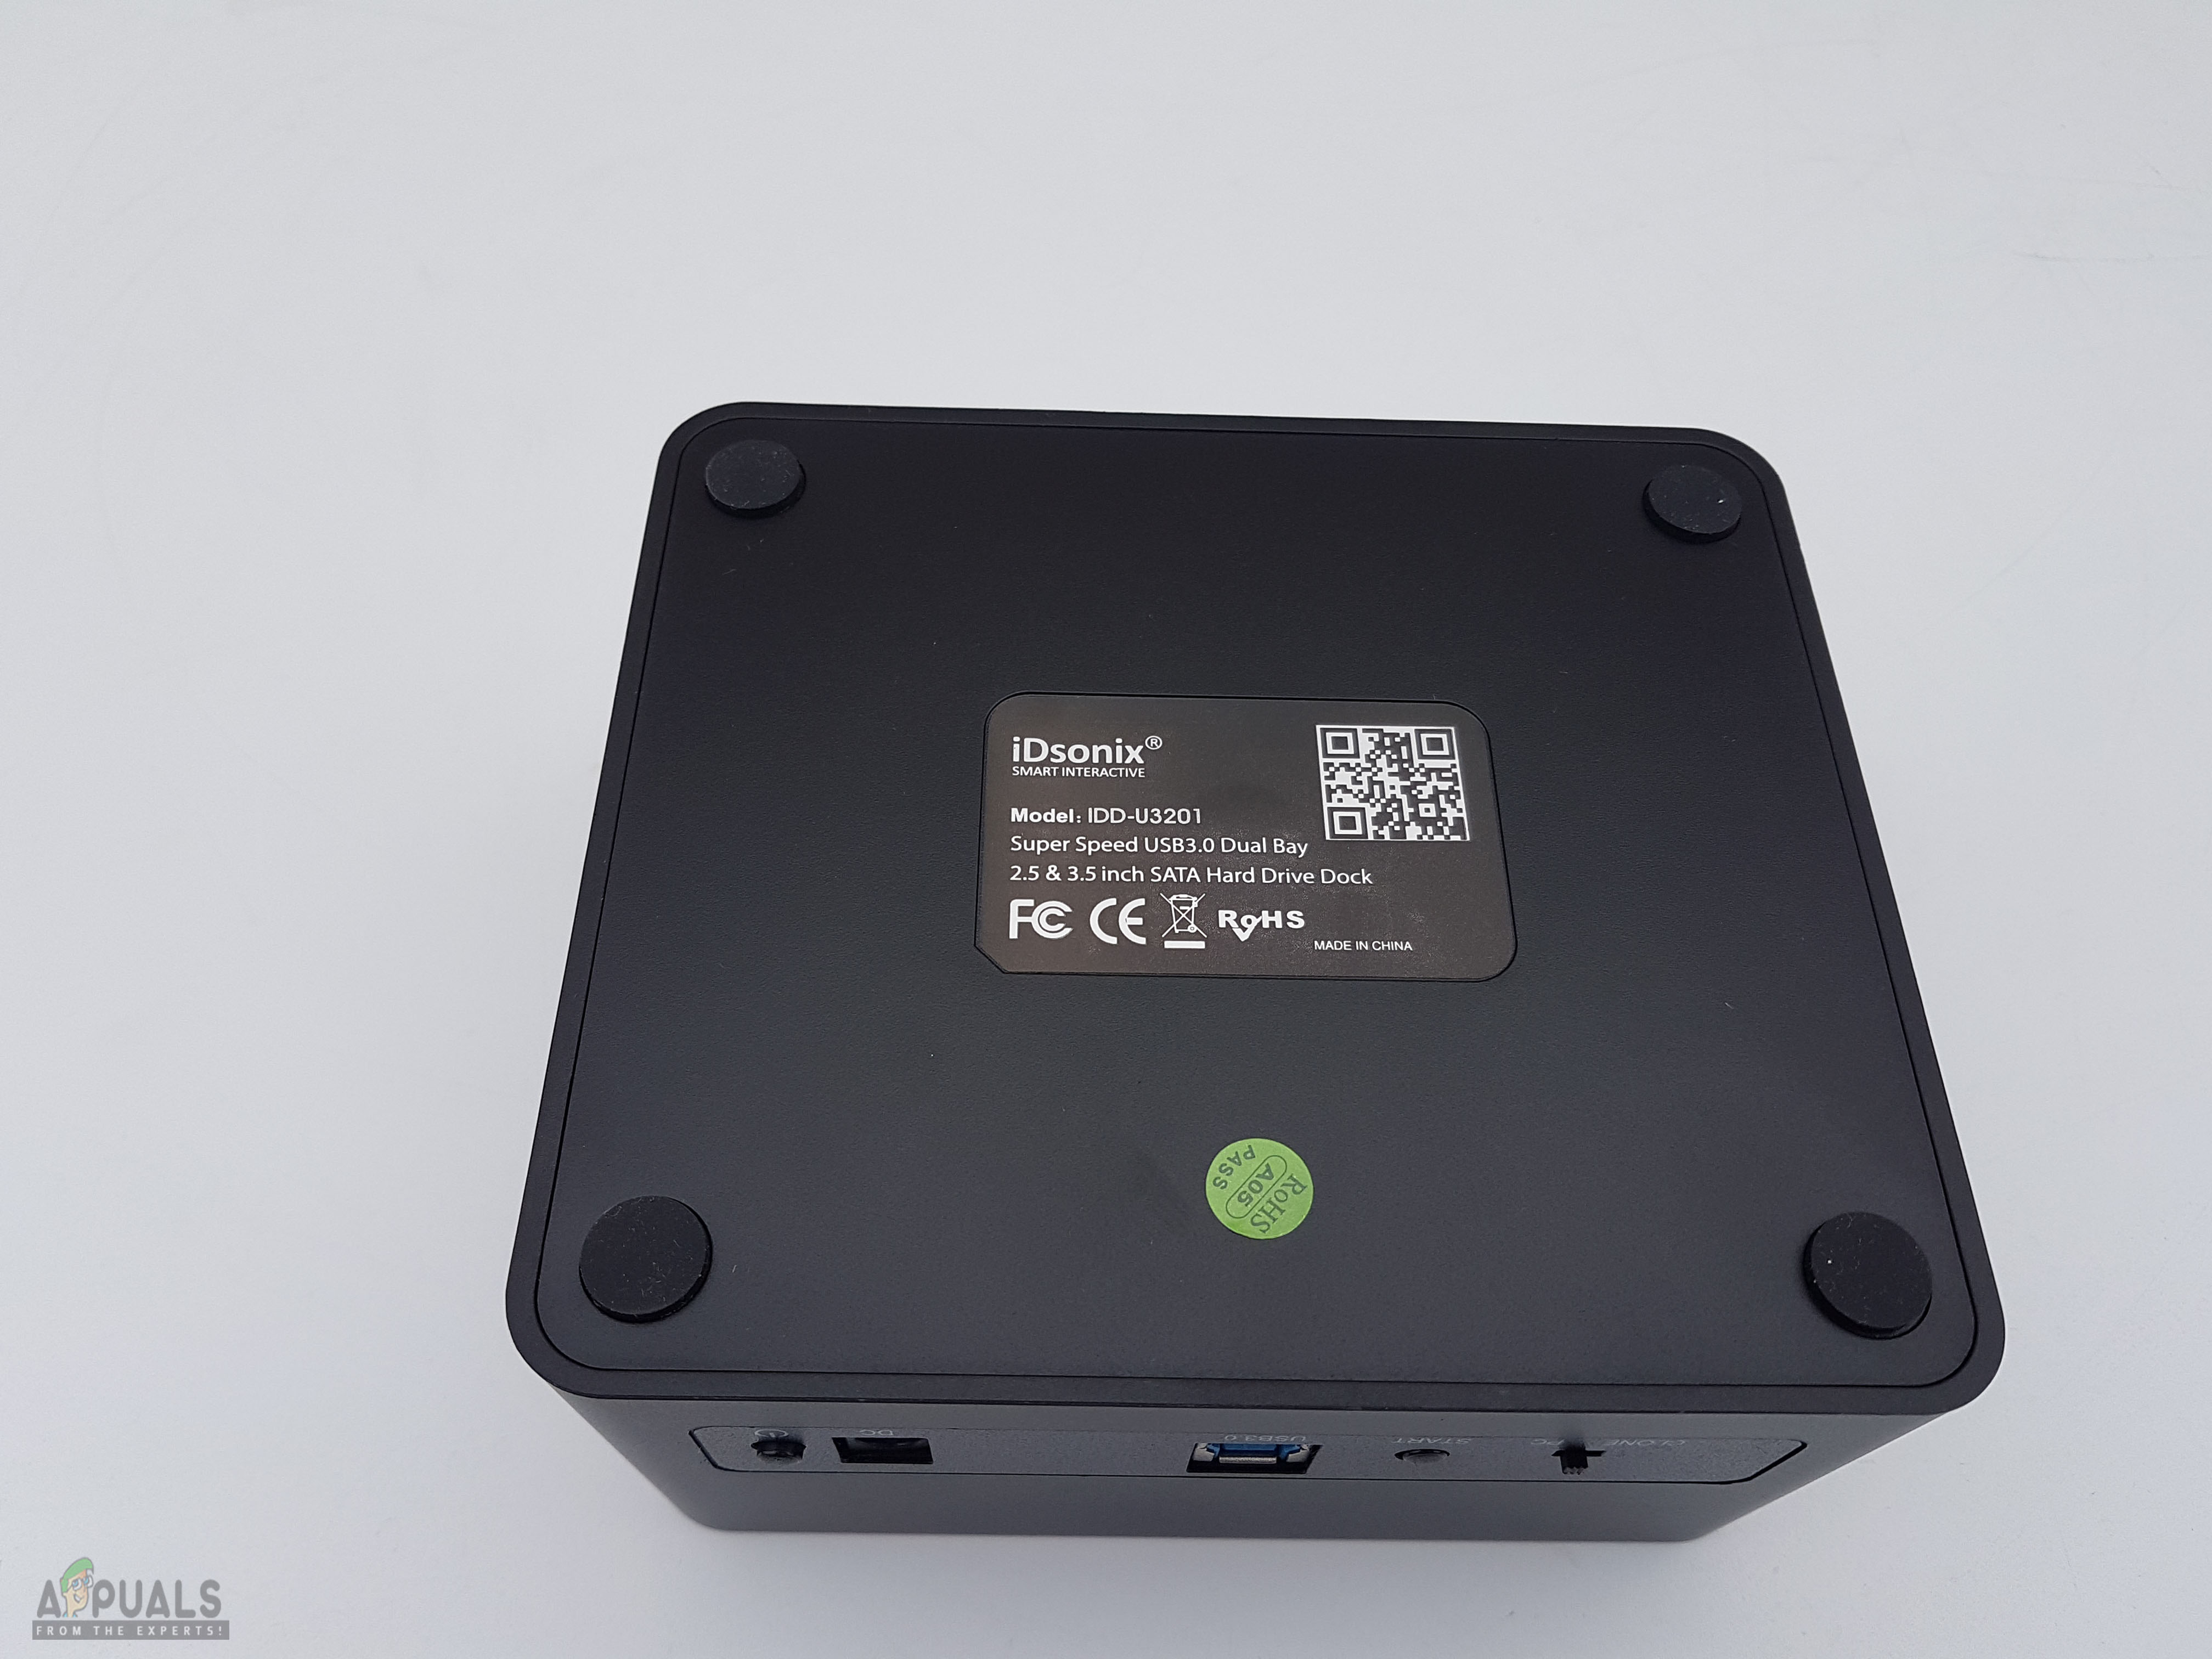
Looking at the bottom of the iDsonix™ IDD-U3201 USB3.0 SATA Hard Drive Dual Bay Docking Station, there are 4 rubber pads or feet. These serve to reduce the vibration and to avoid scratching the surface. There is a sticker pasted in the center. The product is made in China. The name of the company and the part name of the products are also printed.
The iDsonix™ IDD-U3201 USB3.0 SATA Hard Drive Dual Bay Docking Station is using the UASP protocol combined with the USB 3.0. For this purpose, they have bundled the USB B cable having a length of 3.3 feet. The cable is sleeved.
Well, there is a dichotomy here. The specifications have mentioned the power adapter having a power rating of 12V at 4.0A but the physical printed power ratings on the adapter show it to be 3.0A.
Cloning Process
The cloning process is very simple. Here are the steps needed:
Disconnect the dock from the PC if already connected.Set the slider button to the Clone.Power it off.Plug the drive to be cloned in the Source labeled bay.Plug the target drive in the bay labeled as Target.Power on the docking station.Press the start button.The progress indicator LEDs at the bottom will start to blink.As soon as the progress reaches 25% of completion the 25% LED will change to static blue while the rest of the LEDs will continue to blink. This will repeat at 50%, 75%, and 100%.Once the cloning process is completed, the dock will beep three times indicating that the clone has been successfully completed.
There are certain cautions for the cloning. These are:
The Target disk must have more storage capacity than the source disk.Make the backup of the contents of the target disk if needed as they will be erased during the cloning process.Wait till the unit makes three beeps. Removing the drive(s) during the operation or at 100% LED indicator will fail the process.According to the manufacturer, the cloning speed will range 60-80 MBPS. Hence, cloning a 500GB drive will take 2 hours. A 1TB drive will take 4 hours. A 2TB drive will take 8-9 hours.
The above picture shows the cloning of HyperX 120GB 2.5” SSD to the ADATA 240GB 2.5” SSD. The cloning of 120GB SSD took 10 minutes and 59 seconds.
PC Connectivity
Connecting the iDsonix™ IDD-U3201 USB3.0 SATA Hard Drive Dual Bay Docking Station to the PC is a simple task as well. Here are the steps:
Power off the dock.Plug the drive(s) in.If connecting a single drive then preferably plug it in the Source labeled bay.Set the slider button on the rear panel of the dock to the PC.Connect the USB cable to the USB 3.0 port of the motherboard.Power on the dock.The plugged drives will appear standalone which is a good implementation.In case drives don’t show up, go to Disk Management and initialize the drives.
That is all that is needed to be done.
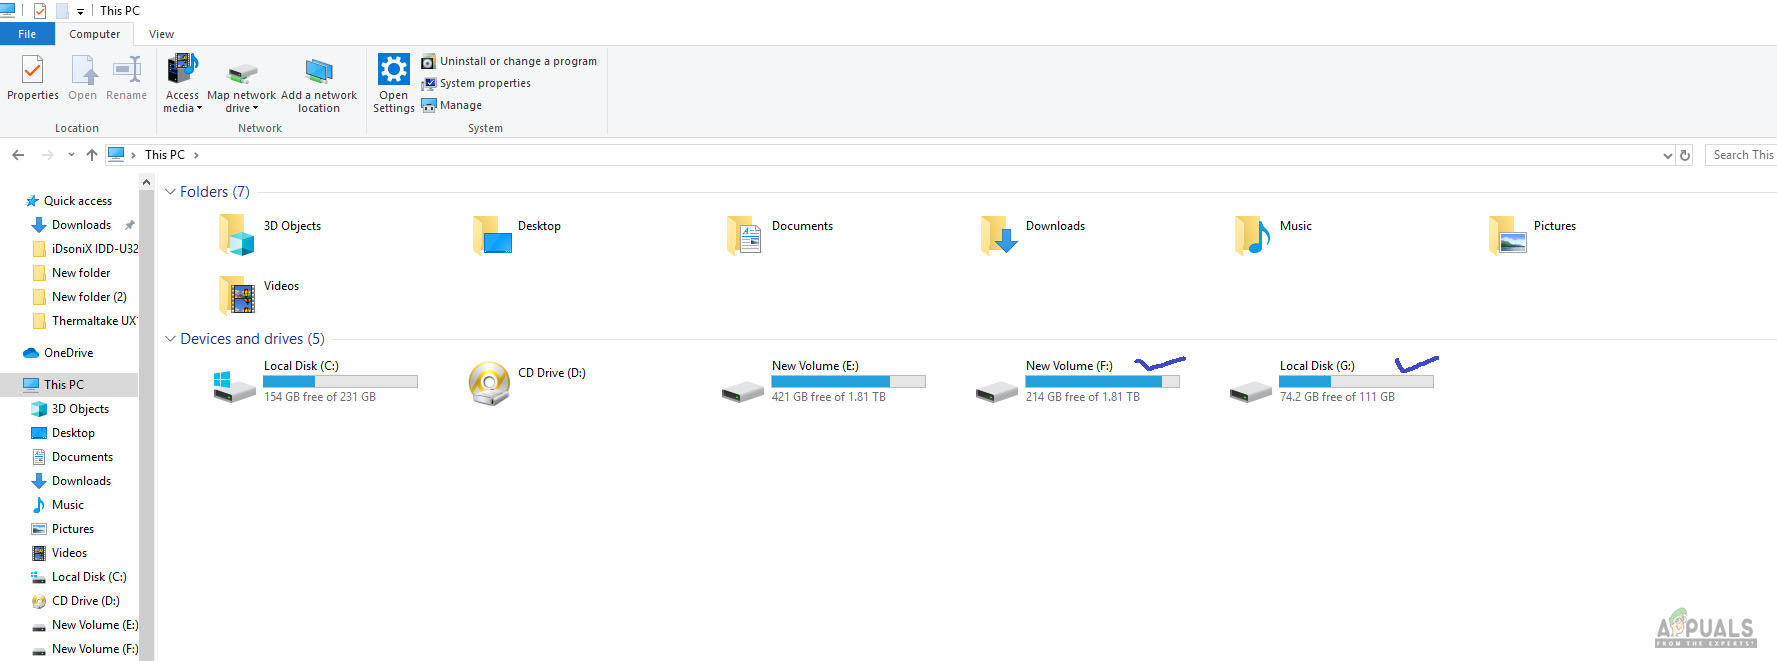
I plugged two 2.5” SSDs having 120GB and 240GB storage capacities in the dock and connect it to the PC. As soon as the dock was powered up, the drives were recognized and both got to show in the My Computer.
As can be seen in the above picture, the drives with a red color checkmark are the ones plugged in the dock and connected to the PC. The user can operate them individually.
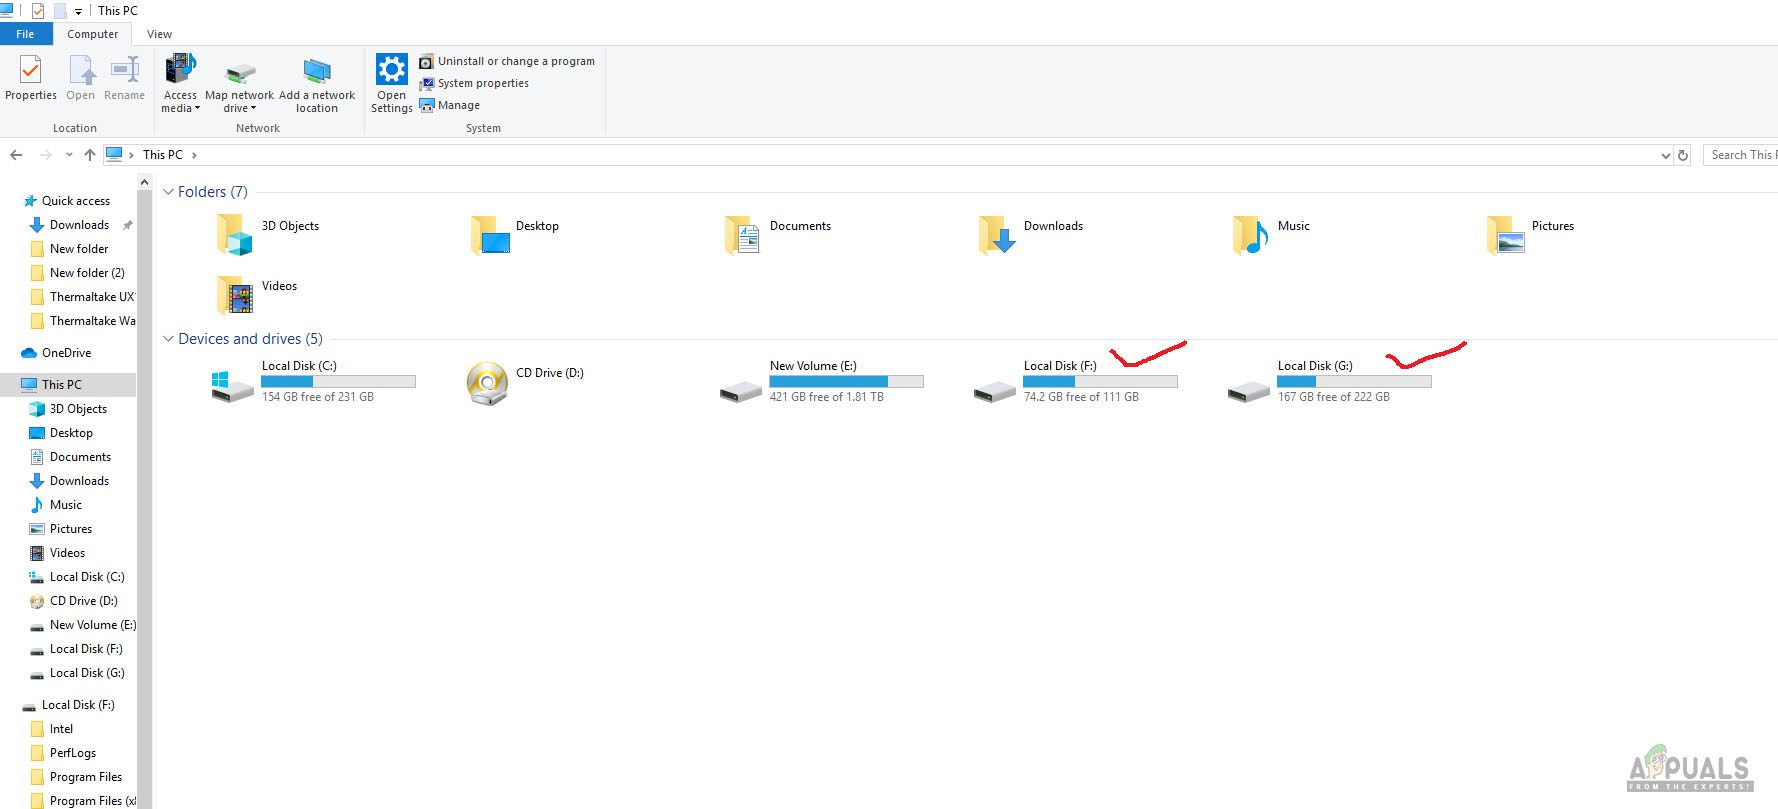
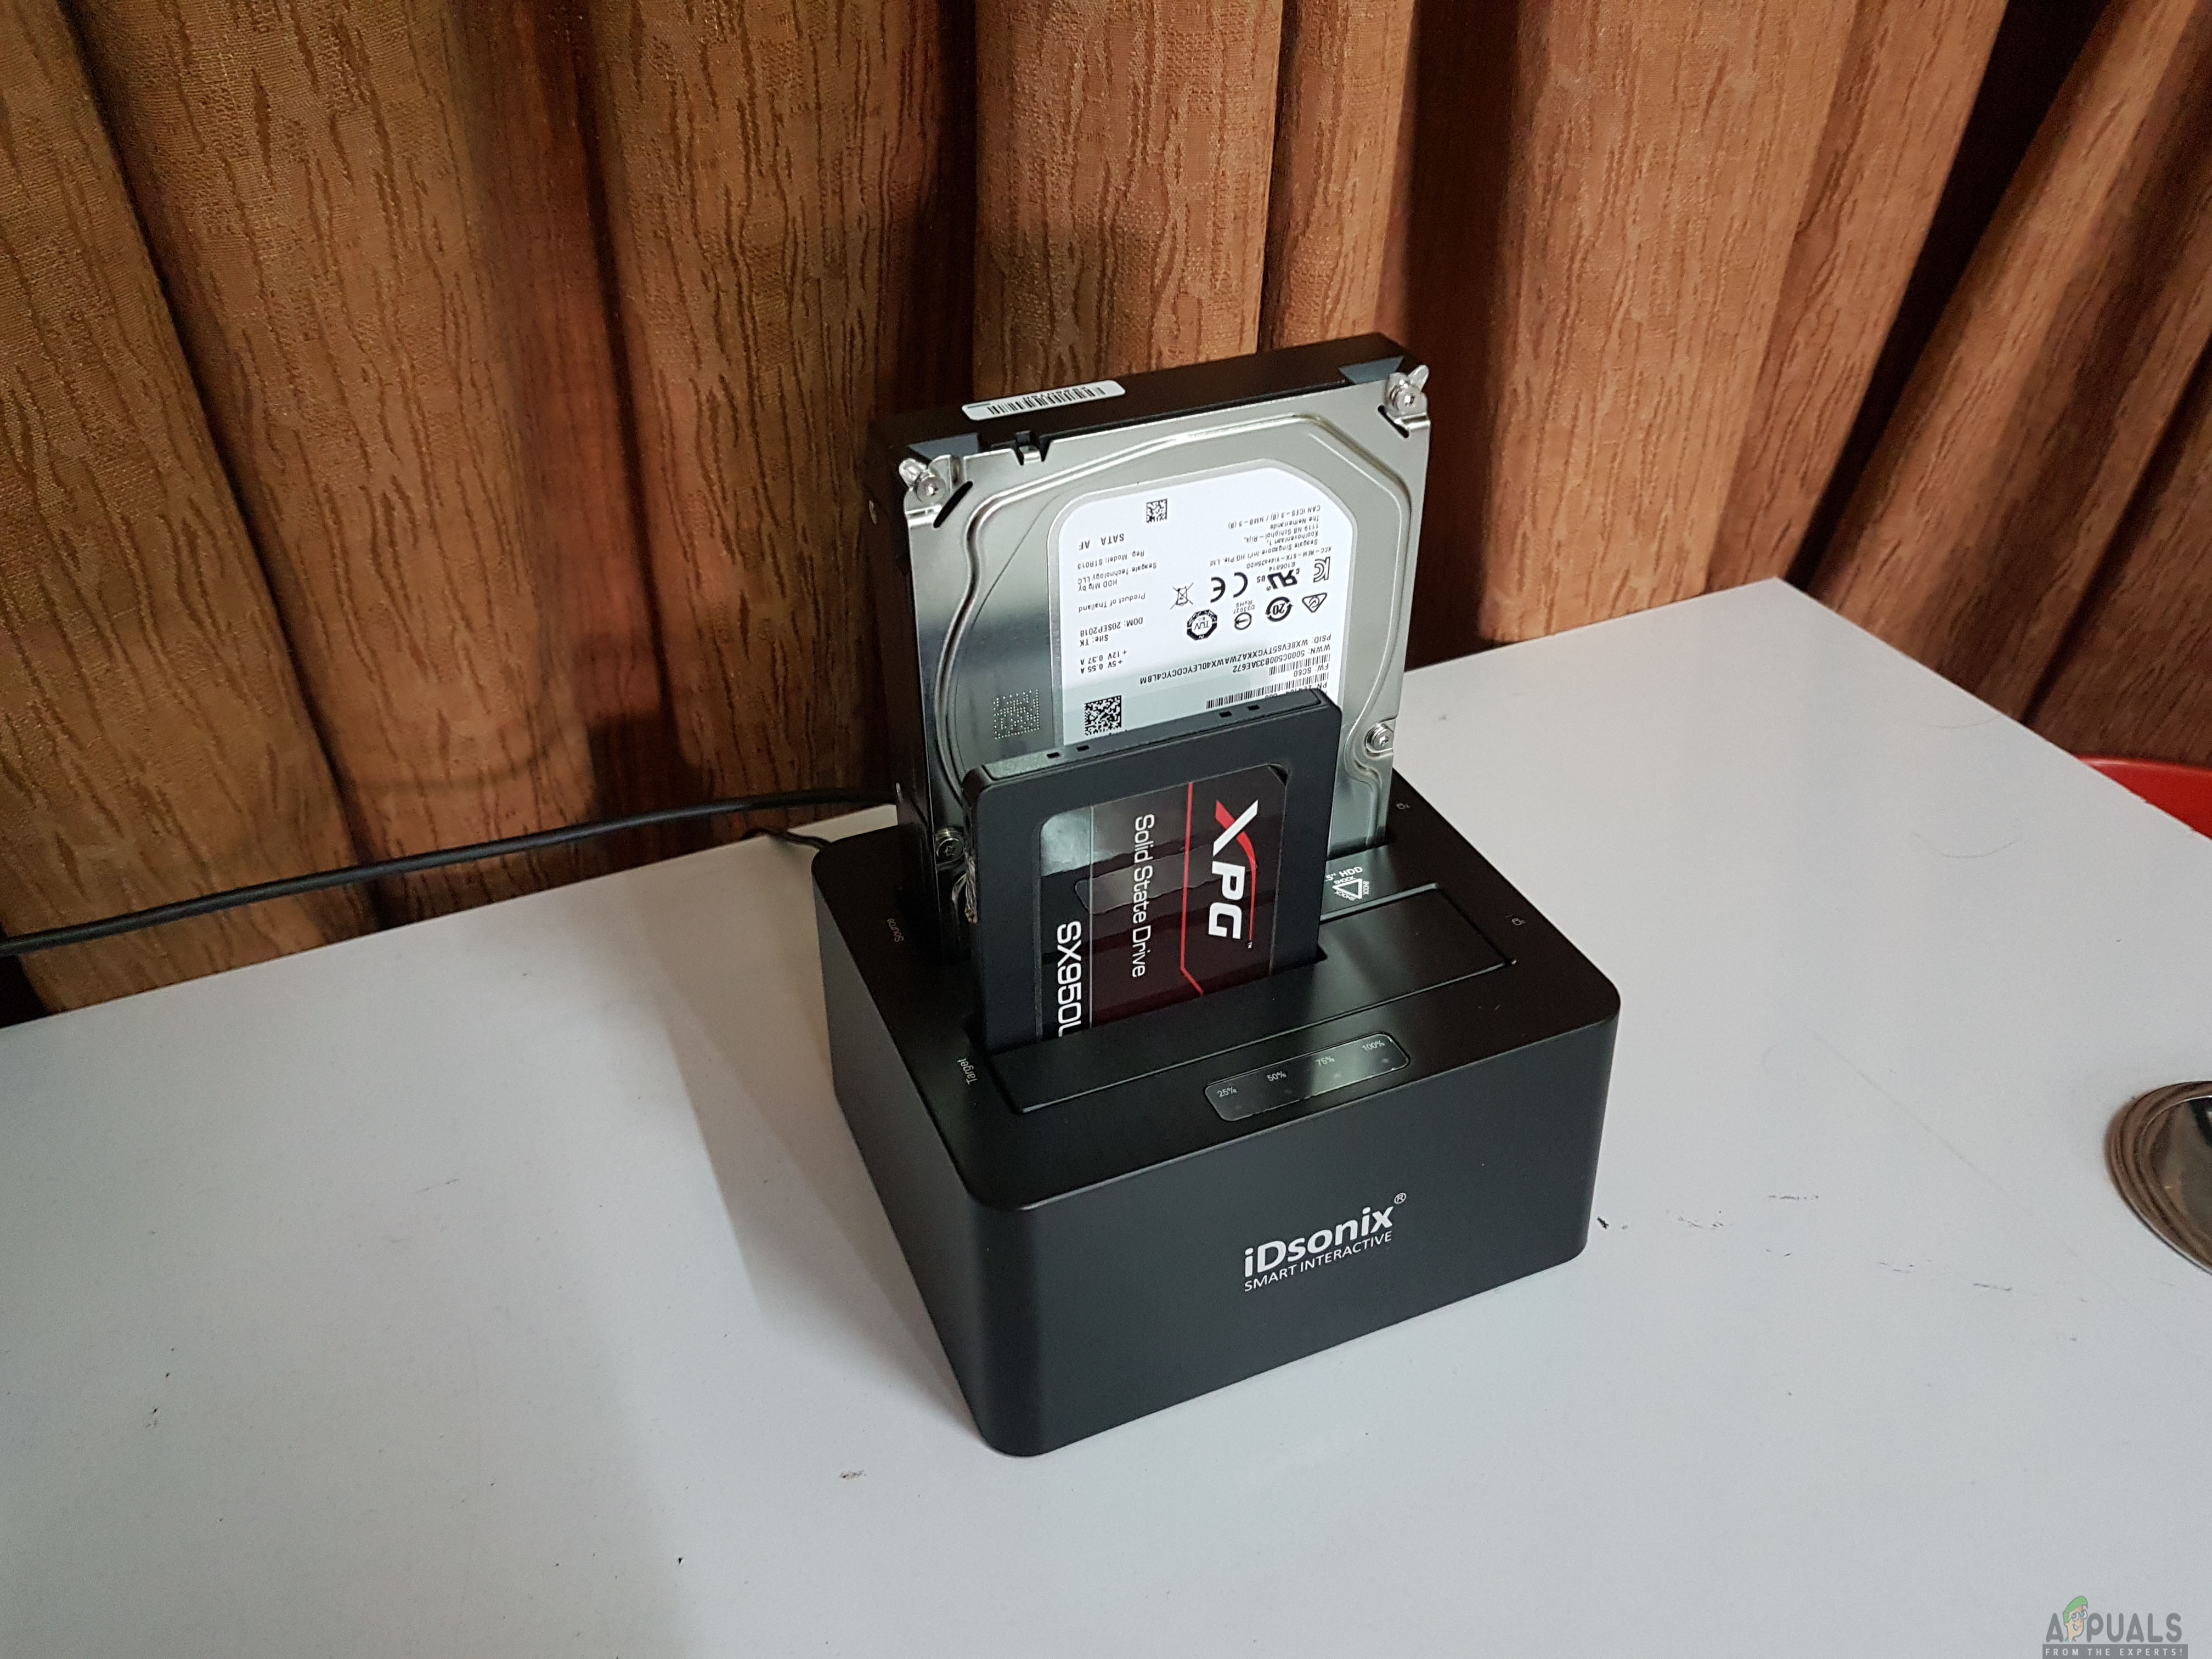
Just for illustration purpose, I also connected a 240GB SSD and a 2TB HDD to the dock and connect the dock to the PC.
The above picture shows that both drives were recognized immediately and were available in My Computer individually at my disposal. I found some good old movies on the backup drive and copied them to the active drive. Jogged some memories for sure!
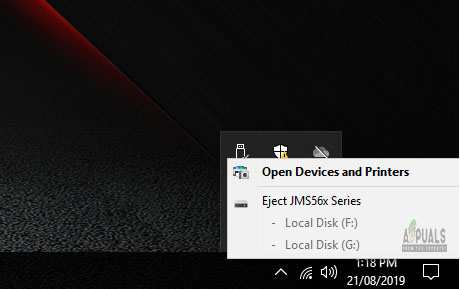
Clicking the USB icon in the taskbar will let the user to safely disconnect the dock and the plugged drives from the PC. It is a recommended step from the manufacturer.
Testing
Enough talk, show me numbers! How come an external dock goes without testing? Following test bench was used to test the drive:
Intel i7 6850kAsus ROG Rampage V Edition 10Corsair Vengeance RED LED 32GB @ 2666MHzModded Alphacool Eisbaer 360Water Cooled Nvidia GeForce GTX 1080 FECorsair AX1200iSamsung 840 EVO 250GB for OSHyperX 120GB SSD [Test Drive]PrimoChill Praxis WetBench
In order to measure the read and write speeds, the following software were used:
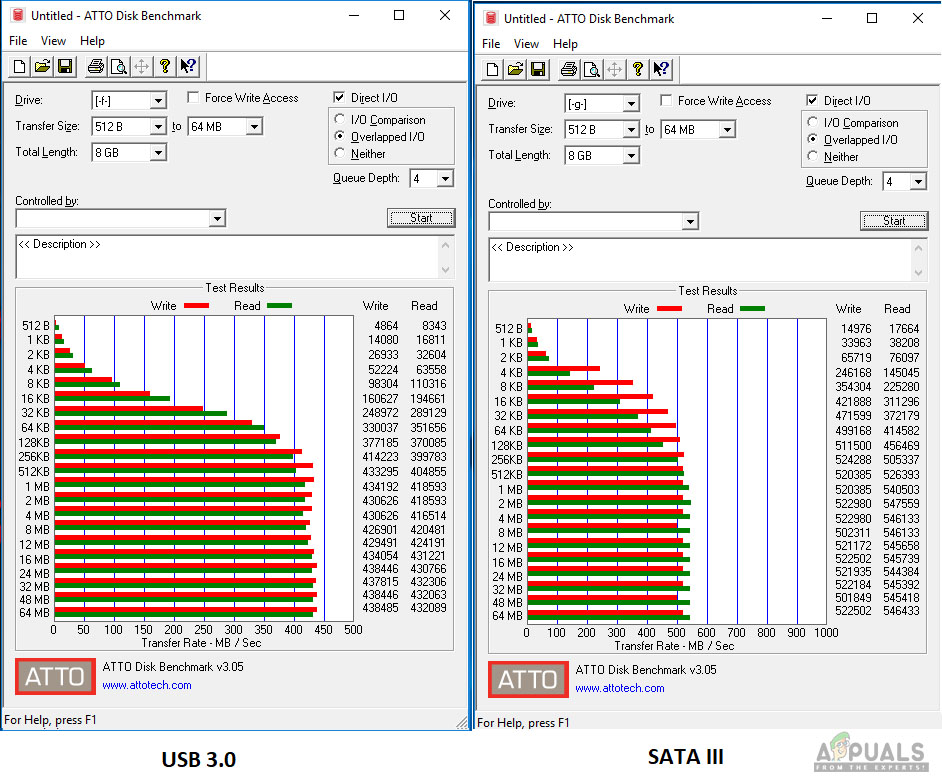
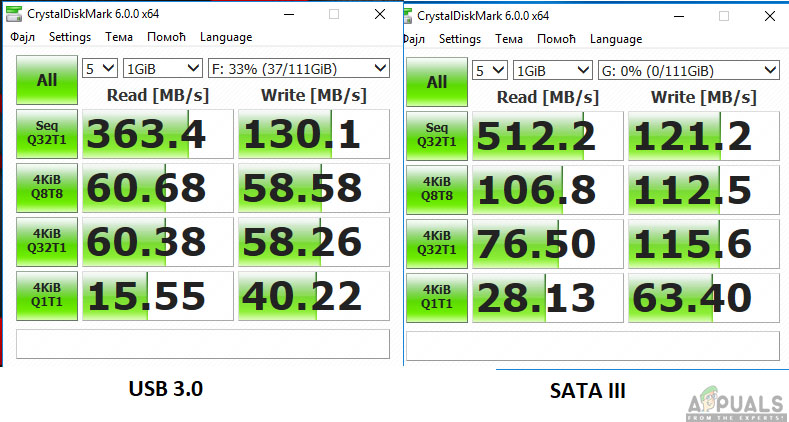
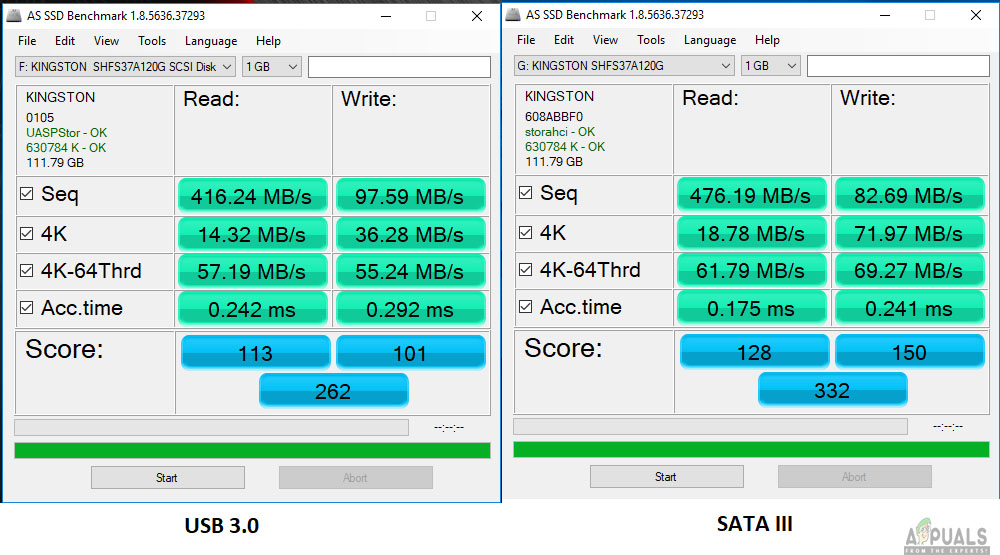
ATTO Disk Benchmark v3.05AS SSD v1.8.5636.37293Crystal Disk Mark 6.0.0 x64
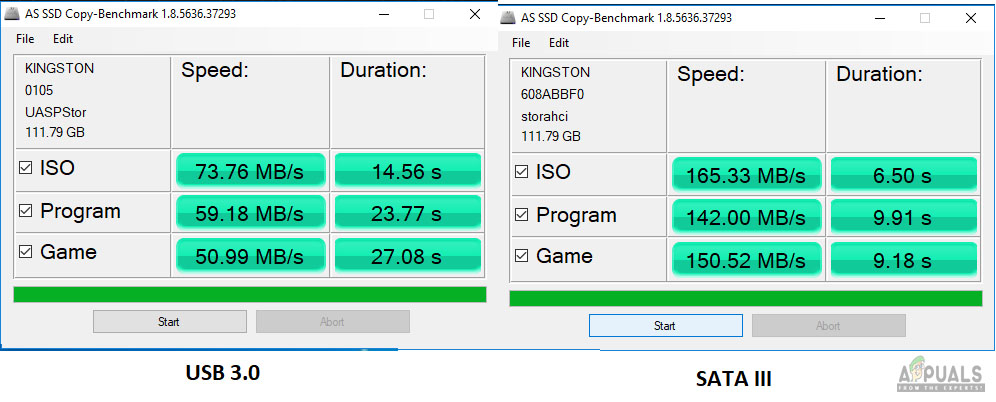
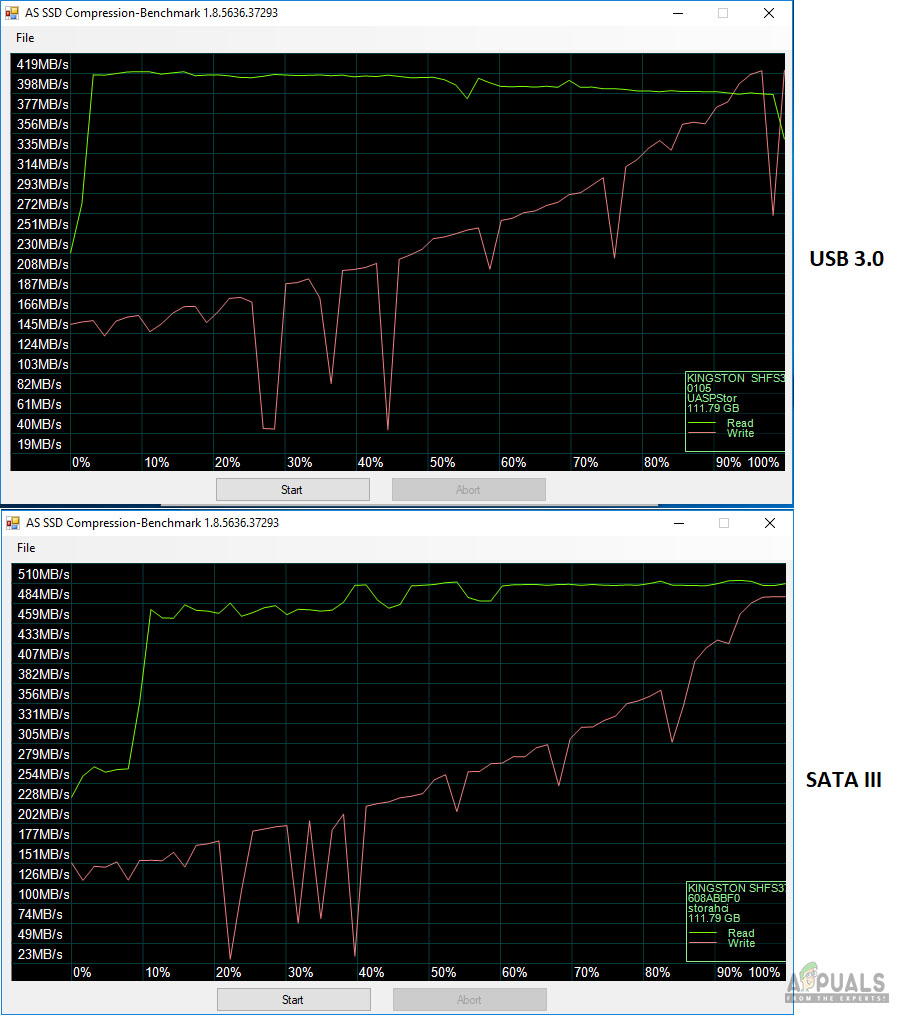
The HyperX 120GB drive was connected to the motherboard’s SATA III port and test run of the above-mentioned software were run. Then the drive was plugged in the iDsonix™ IDD-U3201 USB3.0 SATA Hard Drive Dual Bay Docking Station and test runs were repeated. The dock was connected to the USB 3.0 port on the I/O panel of the motherboard.
ATTO Disk Benchmark
Crystal Disk Mark
AS SSD
Using SATA-III the drive is almost used to its full potential but connecting it to the USB 3.0 with theoretical 5Gbps throughput drops the performance. This is expected and dock performs very well.
Conclusion
The iDsonix™ IDD-U3201 USB3.0 SATA Hard Drive Dual Bay Docking Station is dual purpose docking station. It can host up to two SATA-III drives in 2.5” and/or 3.5” size. Acting as an external enclosure using UASP protocol with USB 3.0 interface this dock connects to the PC and allows the user a convenient way to access their data on-the-go. The second function of the docking station is cloning or duplicating. This dock supports disk-to-disk cloning without needing any software or connectivity to the PC. In fact, the dock has to be disconnected from the PC in order to proceed for the cloning. The dock supports up to 8TB of storage (combined). The dock is available in white and black colors. The dock has support for Windows XP and above, Linux, and MAC. No driver is needed for any operation as it is true plug-n-play. It is CE and FCC certified. I have used 120GB 2.5” SSD to be cloned to the 240GB 2.5” SSD. Cloning was a simple process and it took 10 minutes and 59 seconds for the completion of the cloning process. Since the 120GB SSD was Windows OS disk, I put the cloned drive to the system and try to boot from it and it was a success. Besides, I have used these two SSDs for PC connectivity and both appear separately which is a plus. I have also used the dock with a SATA-III based 2.5” SSD and a 3.5” HDD at a time. Both were recognized and I was able to operate them individually. Price: $35.99 at the time of the review.
Fix: Ethernet Not Working When Connected to Docking Station (DELL)Toshiba Canvio Gaming External Hard Drive Review: Gets The Job Done!Toshiba Canvio Slim External Hard Drive (2TB) ReviewCreating a Web Based Weather Station Using ESP32


